The First 3 Days With Stuart

For the sake of context, make sure you’ve read my post from last week titled The Future Hamster.

June 4th, 2021

Stuart is doing really well, and today I’d like to share what the first three nights with him were like! I gave him these first three nights to settle in without direct human interaction. I thought it’d be neat to have this documented.

The First Three Days

Day 1:

I arrived home with Stuart in his carrier in the early afternoon of May 27th, 2021. After bundling him into the house, I double-checked his masculinity by putting him in a clear jar and looking from below, confirming he is in fact a male.

I released him into his new cage, where he soon discovered his 6.5 inch Silent Spinner wheel, which is plenty big for him since he’s not fully grown. The issue was it’s too heavy for him to push, hence why he now has a 7 inch flying saucer I had kicking around, which is lighter.

Now that he was happily running on his saucer, I began stewing over names. I have a name list, but non of them really suited him. I was going through several TV character names when I decided on Stuart. Stuart Scola is a character from FBI, whose noticeable eyebrows inspired the name.

Stuart retired to the upper story of his house.

Several hours later, at 10:30pm, Stew emerged from his little nest and went to his saucer, where he ran long into the night. I have to say, watching a Robo learn the art of a saucer wheel is quite amusing, as it involves the hamster spinning around and getting flung off many times before they get it.

I removed any potential dangers from the area around the wheel, and went to bed with the soft pitter-patter of little feet resonating around the room. At one point around 3am I woke and checked the time, and Stuart was still on his wheel.

Day 2:

Day two was pretty chill. Stuart had moved his nest under a bendy bridge and happily slept the day away.

He enjoys shredding tissue into tiny bits for his bed, which is quite cute.

Day 3:

On the third morning I made myself an egg sandwich, which I refrained from seasoning and shared with Stuart. I placed the morsel of egg in front of his house, and by the afternoon it’d disappeared.

I heard occasional shuffling around but not much else for the rest of the day until 10:00pm, when he came out to resume use of his wheel. He also proceeded to move his nest onto his two-story platform structure, where he slept the next day.

Conclusion

Next week the story of Stuart will resume, and I will share his taming progress from May 30th to June 15th (the day that post comes out).

I will say, Stuart is a very special boi 😉

If you’re interested in more hamster-related content be sure to like this post and follow the blog, and I’ll be back on Tuesday with more small pet care, DIYs, recipes, cage setups, stories and more, have a ham-tastic day!

The Future Hamster

This is the post you have all been waiting for. It’s the post I’ve been yearning to write. Not only is it my 90th post, but it’s also one of the most exciting posts there is. There is no Future Hamster. There is THE PRESENT HAMSTER! Today, I will be sharing some updates, introducing the new hamster, and retelling his origin story.

Why Did It Take So Long?

After having my first hamster, Beanie, I knew I wanted to own more hamsters and continue to share my knowledge and experience with you on this blog. I had seen Victoria Raechel’s huge hamster cage, and wanted to build a similar version for the future hamster. However, the price of wood doubled while I was sorting out some things, and I could not bring myself to spend $100 on a sheet of wood. Since I have no idea when the price of wood will go down, I decided to temporarily (possibly permanently) use Beanie’s bin cage for The Future Hamster.

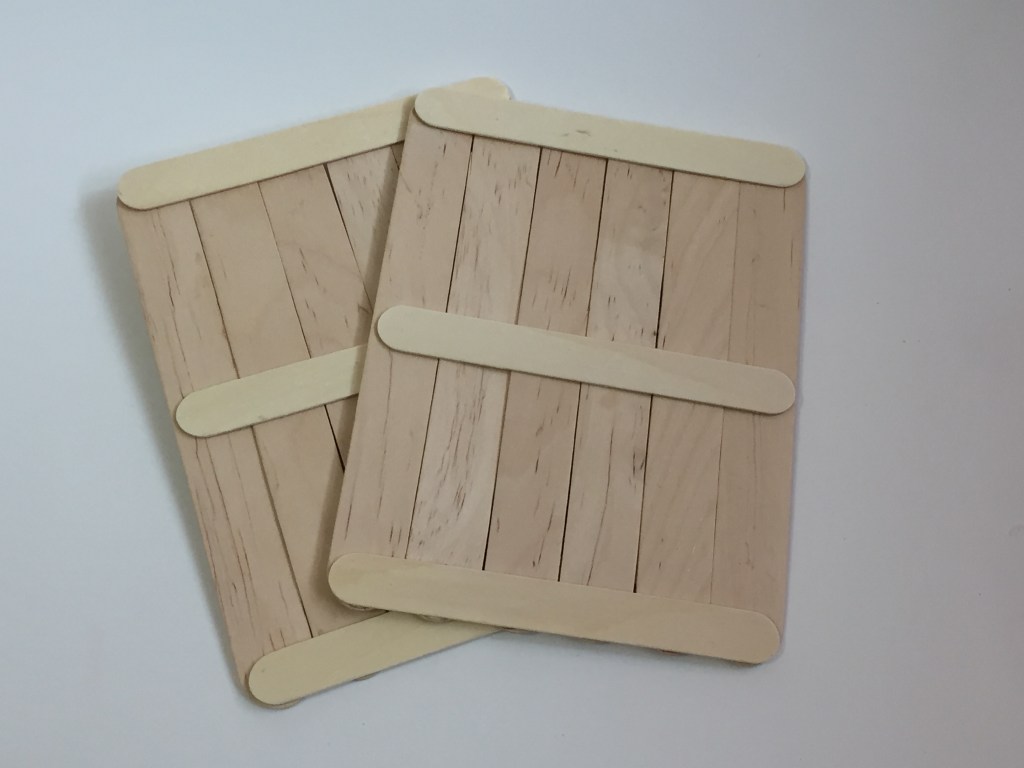
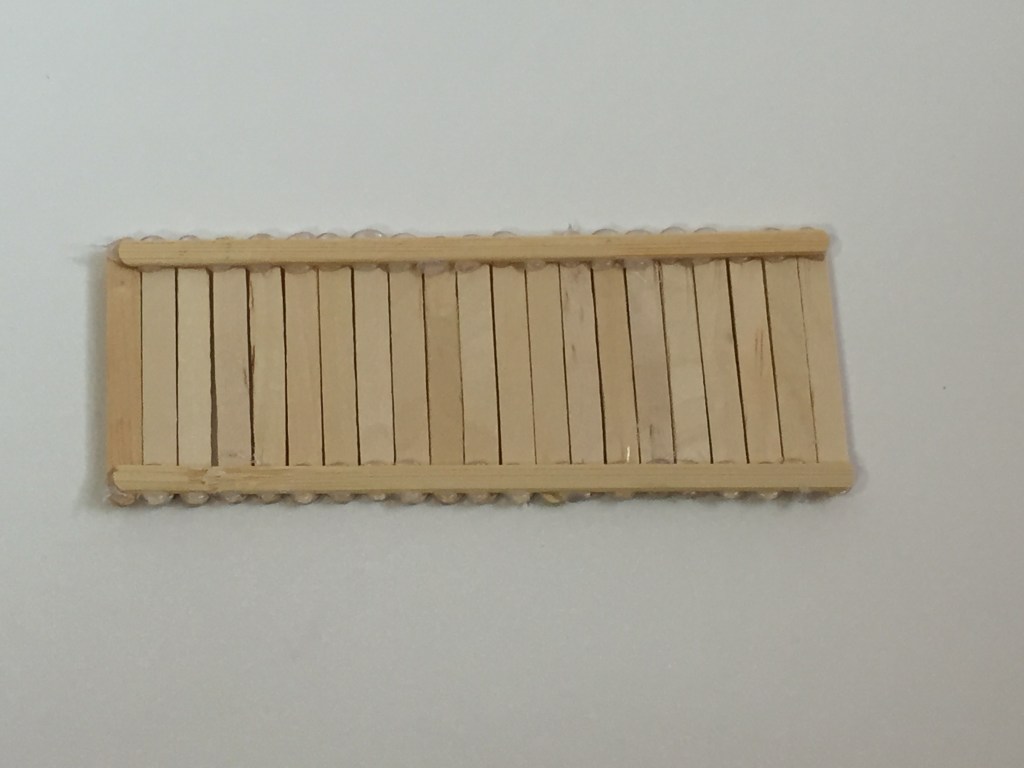
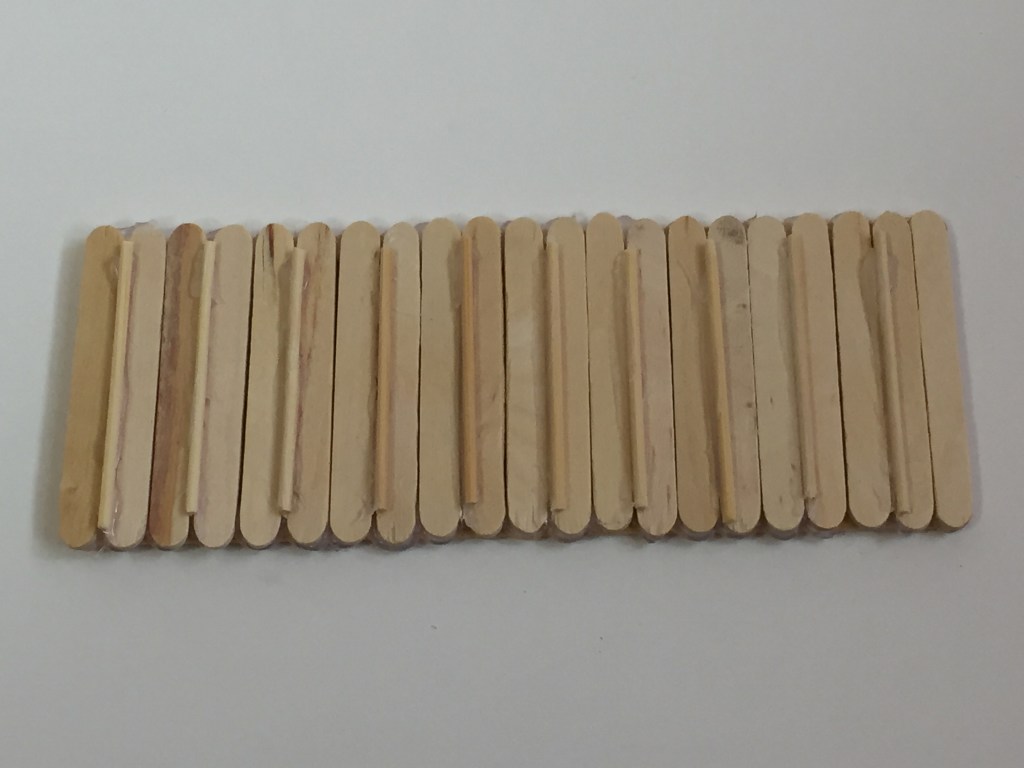
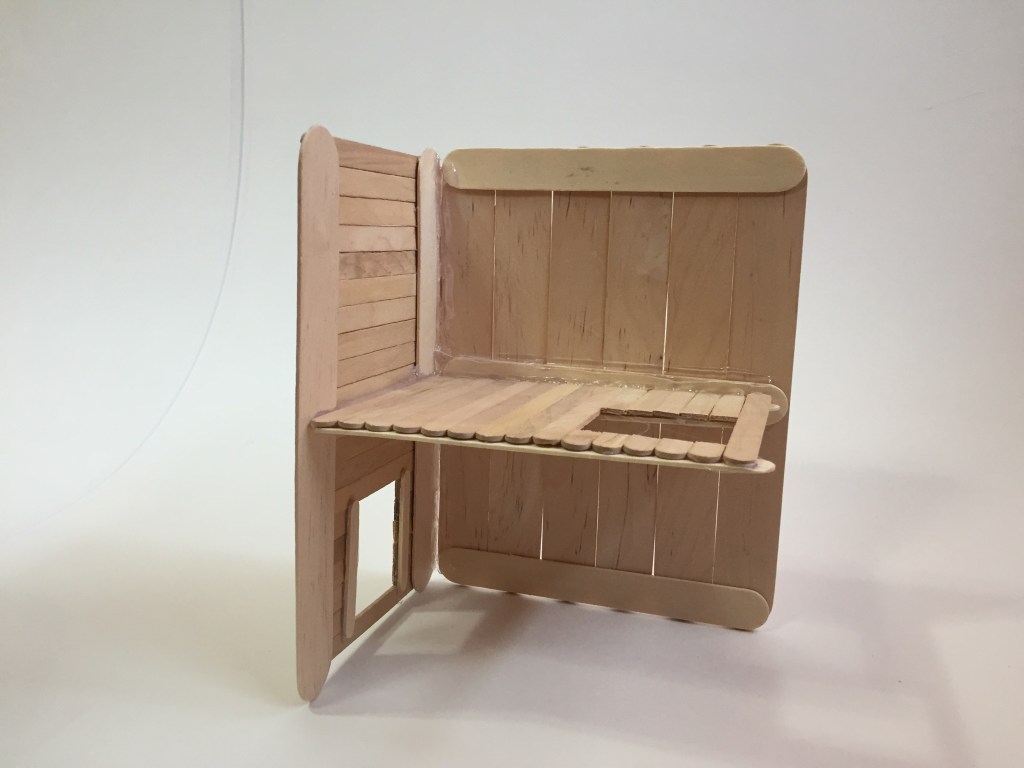
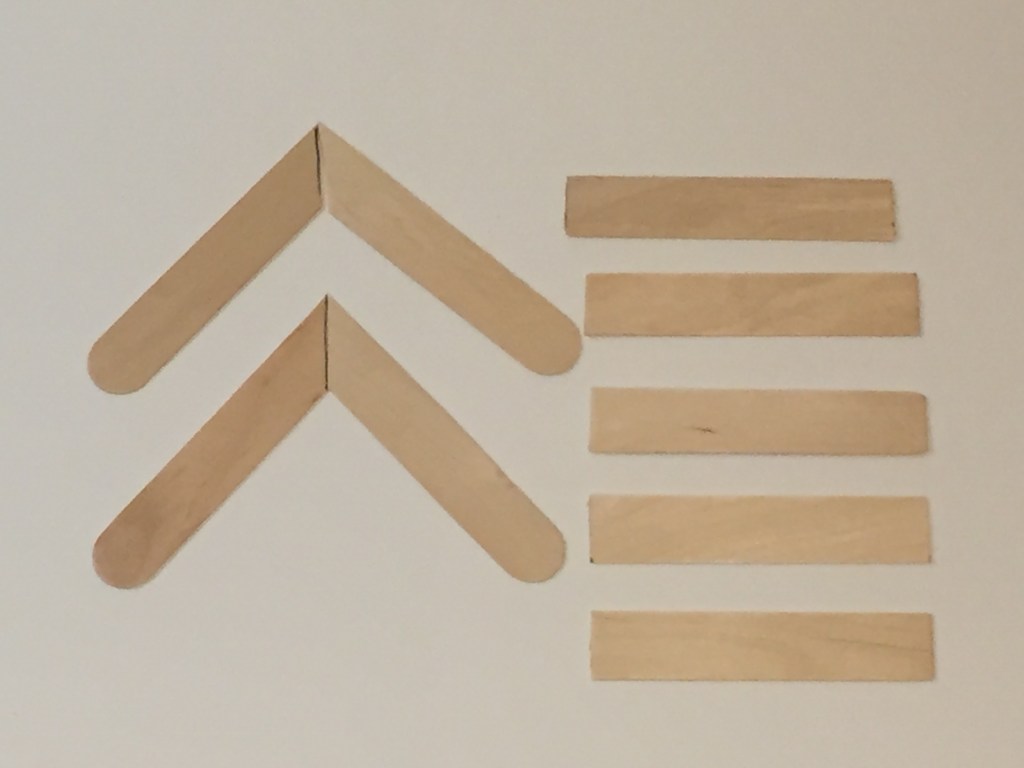
I also wanted to use safe organic soil for my primary substrate, and to have a sand bath, so I purchased the required soil and sand. In my spare time I’ve also been creating unseen DIYs, which I will have tutorials for in the future. So, I had everything I needed for The Future Hamster.

I set up the cage, and was ready. But I had a dilemma: I had been searching buy’n’sell websites and shelters for months, but hadn’t (still haven’t) seen any hamsters for adoption in my area. If you’ve read my post on hamster adoption, you know why I’m not keen on purchasing pet shop hamsters. I was pushed to make a decision: if I wanted a hamster, I would have to purchase one from a local shop. It was a difficult thing to do, but I did purchase my hamster from a pet shop with ethically sized and clean cages with healthy-looking animals all around.

The Big Reveal!

So after exactly 6 months without a hamster, on May 27th, 2021, I brought home my second hamster.

May 31st, 2021

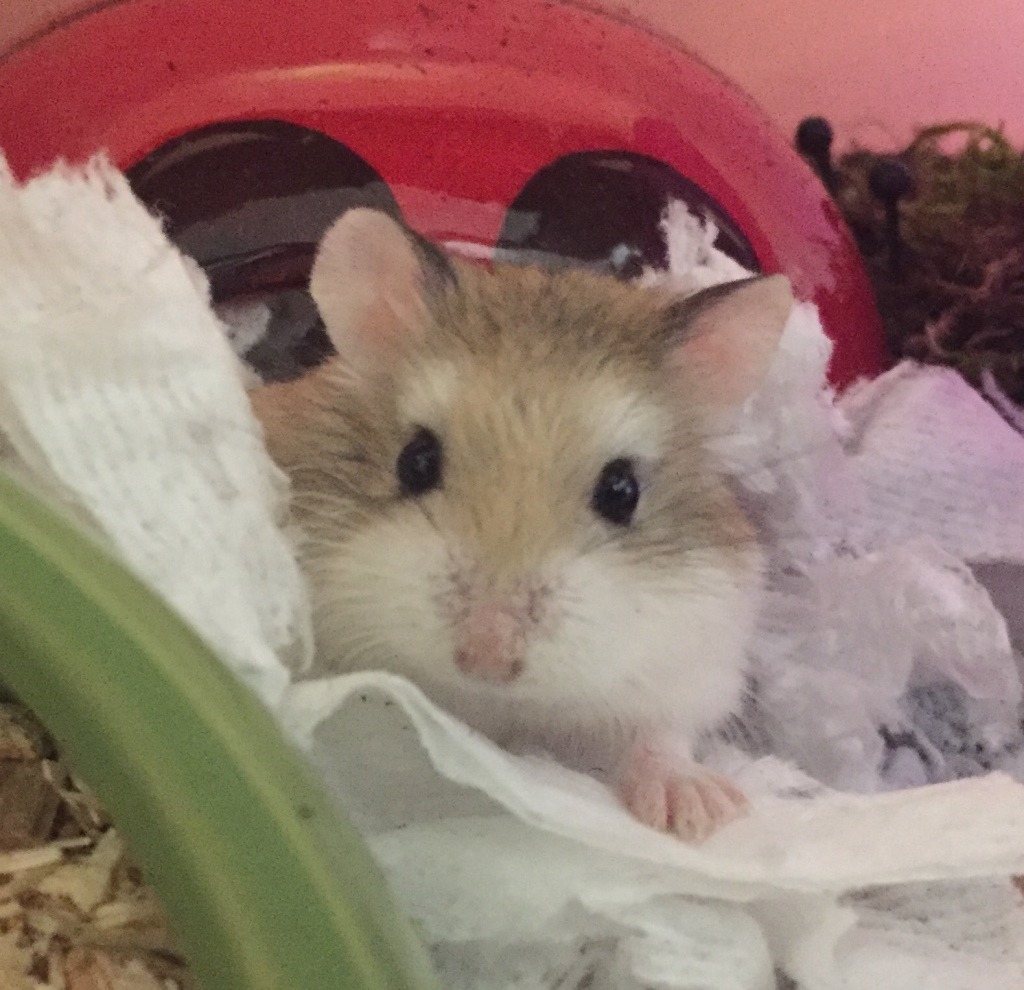
I’m very excited to introduce you to my new male Agouti Roborovski Dwarf Hamster, Stuart!

I have estimated Stuart’s about two months old, so we’ll be celebrating his birthdays on March 27th.

Stuart is named after Stuart Scola, a character from the TV show ‘FBI.’ He has many cute nicknames already, such as Stew (like the food), Stewy, Stew-baca, Stew-preme, Stew-Man (does whatever a Stew can), Stew-Boi, and Super Tiny Epic Walnut (S.T.E.W.). He will be referred to as Stuart or Stew on this blog to keep things simple 🙂

Having only had him since Thursday, I still have so much to learn about his personality, but I’ll have plenty to share about him next week. I love him so much, and look forward to documenting Stew’s life and my experiences with him, and sharing them with you! I’ll also try to post photos of him often as well.

Blog Updates

Over the next few weeks I’ll be posting mostly about Stew. I’ll be documenting his taming process, his personality, and sharing any updates about him. If you’re interested in seeing Stew’s life unfold, you can follow this blog to receive updates when the latest “Stew Story” comes out.

As with Beanie’s life story, Stuart will also have his own life documented in a similar format to Beanie, with each post dedicated to him listed as a ‘part’ of the story. I hope to create a new part or two each month, and make the part about everything he did in the time since the last part, or one major event.

And in case anyone was wondering, I am not changing the blog title to ‘Stuart the Hamster.’ I still feel that Beanie should remain the ‘title hamster,’ as she was the inspiration for this blog.

And now, I will introduce Part 1 of the Stuart Saga:

Part 1: Selecting Stuart

May 27th, 2021

After coming to the conclusion I would get a pet shop hamster, I spent the evening of the 26th preparing for The Future Hamster.

I had already set up the cage, but I took everything out and redid the setup, ensuring to rub my scent onto everything. This helps new hamsters adjust to your presence and smell. I also sieved the sand bath, which made the sand much smoother.

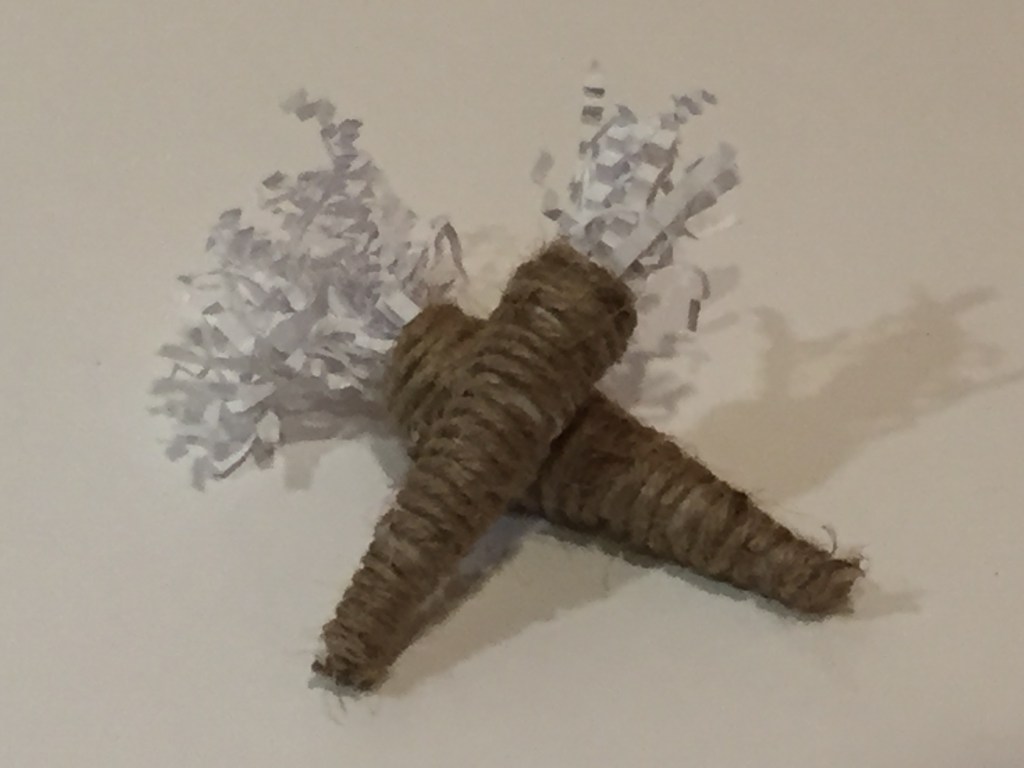
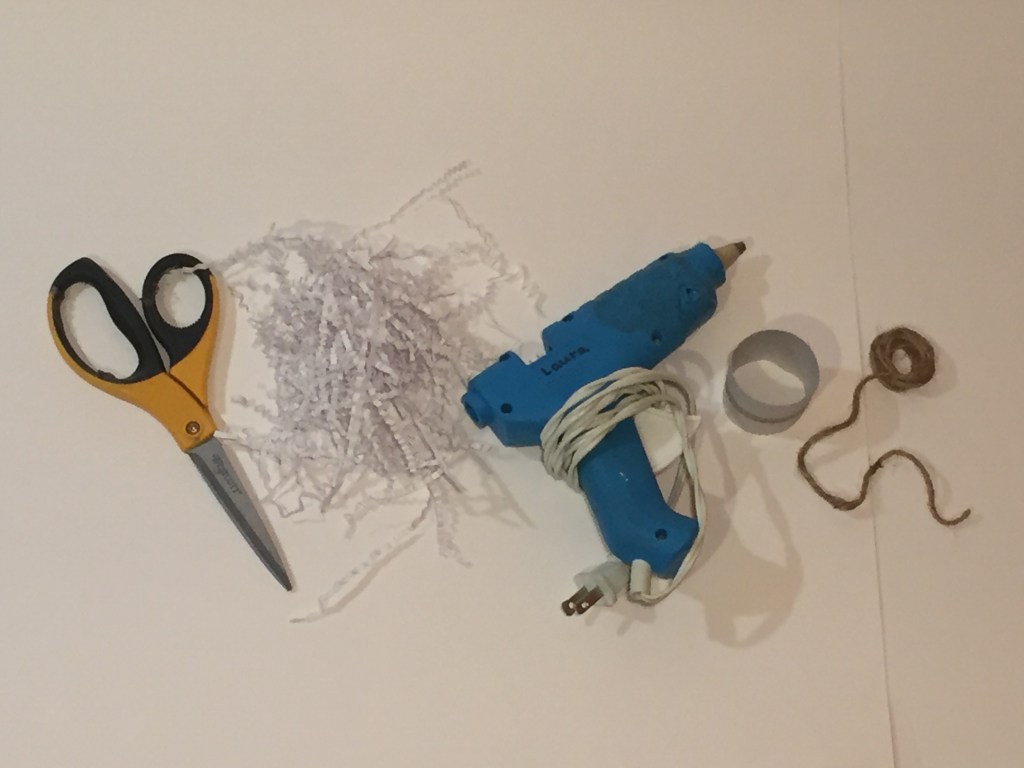
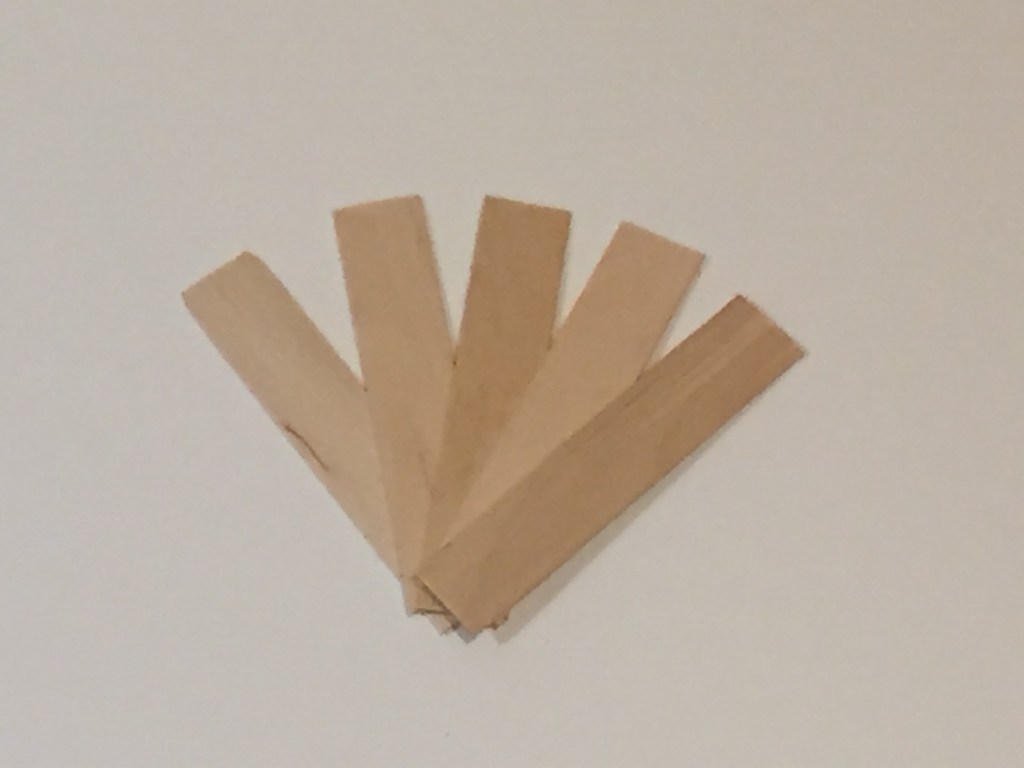
I also shredded some tissue and filled my living world hamster carrier with it so the hamster could hide in the tissue.

The next day I called the shop, who confirmed they had Roborovskis in stock, and I set out to get my hamster! Although I was really happy and excited, I was also incredibly nervous! I had been planning to get a male Roborovski for some time, so I already knew what I was looking for when I entered the shop.

I requested access to the hamsters. The nearly identical little Robos scattered when the employee ripped off their hidey house, much to my dismay. I then leaned into the cage, letting the hammies sniff and run around my hand for a while.

I noticed Stuart, in particular. What made him different to me was his more curious nature, which is a very good personality trait and can make taming quicker. He also had white fur that went above his tail around under his stomach, unlike the other little hamsters. He was different, and I knew I wanted him.

After a couple attempts, I scooped him into the upturned hidey house and into my carrier, where he dug into the tissue. I wrapped the carrier in a sweater to prevent him getting chilled, and headed home with my second hamster.

Conclusion

That was just the first Part of Stuart’s life with me, and in the next month I will be posting Part 2: The First Days With Stuart, Part 3: Stuart’s First Week of Taming, and Part 4: Stuart’s First Cage Clean.

If you’re not interested in Stew (though I’m not sure if that’s possible), I will be resuming DIY tutorials and educational posts once the initial ‘Stuart Craze’ passes.

So make sure to like this post and follow the blog to see weekly hamster-related content, and I’ll see you on Tuesday with more small pet care, DIYs, recipes, cage setups, stories and more, have a ham-tastic day!

Budget-Friendly Cleaning and Tidying Supplies and Tips

Cleaning and tidying is a big part of hamster owning. Some people, such as myself, love it, and some… not so much. Whether you’re a neat freak or a cleaning procrastinator, these budget-friendly supplies and tips should make the cleaning and tidying process more efficient.

A Mini Broom/Dustpan Set

Mini broom and dustpan sets are very useful for sweeping off platforms and scooping out soiled substrate quickly without getting your hands dirty.

These little sets can be found pretty much everywhere, but if you’re looking for something cheap, make a beeline for your nearest dollar store.

I purchased my mini broom and dustpan set from Dollarama for $1.50.

If you can, try to find one with a small broom and a large dustpan; this will make sweeping little spaces easier and scooping out large amounts of bedding quicker (thanks to ErinsAnimals for that tip).

White Vinegar

White vinegar is really handy to have around for cleaning. It’s cheaper than specifically made pet cage cleaners, while accomplishing the same task of sterilizing without posing any risk to your hamster.

When using white vinegar with animals, it should be diluted with water. How much you dilute it is based on personal preference. I would recommend doing at least a 50/50 water/vinegar ratio so the vinegar isn’t ridiculously strong.

Even diluted, vinegar has a semi-strong odor.

To use the vinegar/water cleaner simply spray or wipe down the items you’re cleaning or douse the items with the solution. Let the items sit for a couple minutes, rinse with water, and dry with a cloth or allow them to air dry.

A jug of white vinegar can be purchased at Dollarama for about $2, or pretty much anywhere else for a few extra bucks.

A Spray Bottle

This might seem somewhat strange, but spray bottles are really useful for cleaning pet supplies.

I like to put things that need cleaning in my shower, spray them with vinegar/water, rinse them, and let them air dry all in one place. It’s super easy.

I myself have a ‘Professional Spray Bottle’ from Dollarama which you can purchase for $2 or $3. They can also be ordered online or found in most stores with a cleaning supply isle (Walmart comes to mind).

Baby Wipes

Baby wipes are basically the simple, less extreme version of vinegar. They don’t kill as much bacteria, which is fine for those little spot cleans.

… they kinda smell nice, too.

Baby wipes can be purchased in most Pharmacies or grocery stores for around $5.

A Vacuum

You know when you’re done scooping out all the substrate from your hamster’s cage and you realize there’s still a tonnnn of dust and poop in the cage base that your trusty broom can’t get? Never fear, the vacuum is here!

This item will most likely cost nothing since most people already have one. Of course, a hand-held vacuum or one with a nozzle will work best, so if you don’t own one of those they can be purchased for…. (I googled price average)….

I’d try to live without one.

Unless you have $50-$100 for a vacuum.

Conclusion

Okay with the exception of the vacuum (seriously, $50??), you can purchase all these supplies for under $10 if you scope out the dollar store.

I hope this post provided some ideas for how to find and use some super budget-friendly cleaning supplies, so you can cheaply and efficiantly care for your pet.

If you’re interested in more hamster-related content be sure to like this post and follow the blog, and I’ll be back on Tuesday with more small pet care, DIYs, recipes, cage setups, stories and more, have a ham-tastic day!

DIY Twine Carrot Tutorial

Hello and welcome to the DIY (do it yourself) twine carrot tutorial! These are quite common small pet toys, and are available in most pet stores. I used to have one of these toys for Beanie, and she had a great time decimating it. My version is smaller than the ones you’d typically find in stores, but it is also adorable 😍

For this project you’ll need:

  • Scissors
  • Paper crinkles
  • Hot glue
  • Toilet paper tube
  • Natural twine
  • First cut a triangle out of the tube.
  • Roll the tube, making the end really tight and letting the other end be loose.
  • When you’ve rolled it into a carrot-shape, glue the edge to keep it from unraveling.
  • Cut off the extra cardboard sticking off the top.
  • Put a dob of glue inside the carrot base, and stuff in paper crinkles.
  • Starting by the ‘stem,’ glue twine around (and around and around and around) the cardboard ‘carrot’. Add glue occasionally to prevent the twine from unraveling.
  • Trim the paper ‘stem’ to your satisfaction.

And the carrots are complete! Give them to hamsters, gerbils, mice, rabbits, rats, chinchillas, and other small pets so they can fling and chew their little carroty boredom breakers 🙂

I hope you enjoyed this tutorial! Please comment in the ‘Reply’ section down below to share your thoughts or experience recreating this DIY.

If you’re interested in more hamster-related content be sure to like this post and follow the blog, and I’ll be back on Tuesday with more small pet care, DIYs, recipes, cage setups, stories and more, have a ham-tastic day!

The Benefits of Natural Setups, Tips for Creating a More Natural Setup, and How to Set Up a Naturalistic Enclosure for Your Hamster

This week we’ll be discussing why you should have a natural setup for your hamster, providing some tips for creating a more naturalistic setup, and briefly talking about how to set up a natural enclosure for your hamster 🙂

Check out the posts and sources linked at the end to learn more about the mentioned topics!

Why a Natural Setup?

Hamsters haven’t been domesticated for very long in comparison to cats and dogs. They still demonstrate many of their natural instincts in their domestic lives, such as burrowing and foraging.

Domestic hamsters are very high-energy animals, since wild hamsters are required to run many miles every night to collect food.

They awaken at night to avoid predators, or sometimes around dawn and/or dusk.

These natural behaviors should be encouraged in your domestic hamster’s instinct-driven life. Naturally setup enclosures provide enrichment and stimulation for hamsters, resulting in a mentally and physically happier and healthier hamster.

What Makes a Natural Setup?

There are several ways to provide a more natural setup and lifestyle for your hamster. By following just a few of these tips your hamster’s life and happiness will be dramatically improved. I do recommend trying to do most (if not all) of these tips. Please do research on specific items before exposing your hamster(s) to any new materials and/or routine changes.

  • Provide a large territory. Hamsters in the wild have enormous territories as large as 10 square miles. They run around during the night guarding their territory from trespassing hamsters and searching for food and nesting materials. In a domestic environment, a hamster’s cage is their territory. The minimum cage size is 450 square inches of unbroken floor space (measure width multiplied by length to calculate floor space). Your hamster’s cage is their territory; please provide the largest cage possible!
  • Secondly, providing an appropriate wheel is essential to your hamster’s mental and physical health. Even if you have a large territory for your hamster, a good wheel is a necessity. The wheel needs to be large enough that the hamster’s back is not bent when running (no smaller than an 8″ wheel; Roborovski dwarfs can be an exception). The wheel can not be too large unless the hamster cannot push it. The second quality of a good wheel is it being solid-surface. Wire barred or mesh wheels are common sources of injury in small animals, and also cause foot infections. A good, large, solid-surface wheel offers your hamster a safe way to get out their energy, making them overall more content.
  • Sprays, herbs, and dried flower petals can be a nice addition to your hamster cage and promote your hamster’s foraging instincts. Sprays are basically dried, raw seeds, not yet picked from the plant. There are a plethora of hamster-safe sprays, such as oat, flax, and wheat sprays. There are also a number of herbs and flower petals which are hamster safe. Herbs and petals can be combined and sprinkled around your hamster’s cage for them to forage for and nibble on, as well as adding some colour to the cage. Sprays, herbs, and flower petals can be purchased online, or sometimes from pet stores. Always research the specific herb/spray/petal to make sure it’s hamster-safe.
  • Having deep substrate for burrowing is also super important! Wild hamsters create burrows between 3-10 feet deep, with winding passages and chambers. Hamsters are actually really organized little creatures, and will make specific ‘rooms’ for sleeping, storing food, etc… in their burrows. By providing plenty of deep (8+ inches) substrate for burrowing they can practice this behavior, which is very enriching for your hamster. Studies have shown that hamsters with deeper substrate (16+ inches) demonstrate fewer to no boredom behaviors (differing from hamster to hamster).
  • Scatter feeding your hamster’s seed mix is another way to naturally enrich your small pet. Simply sprinkle their usual amount of food around their cage, and they can forage for their meals. Working for food makes your hamster feel rewarded for their hard work, and keeps them entertained. It is recommended that you don’t scatter feed daily, since your hamster may need extra time to gather their food. Instead, feed them every 2-3 days, and the same amount you would in that time.
  • Foraging toys are a great way to work your hamster’s brain. There are tons of foraging or puzzle toys, which are usually filled with food or treats. Your hamster then has to chew open the toy to get the loot. These toys also help with dental needs, since hamsters must chew things to keep their ever-growing teeth trim.
  • Natural toys also play a part in a natural setup. Natural toys are usually made from wood, grass, hay, cardboard, or rock. Natural toys provide different textures for your hamster to walk on and explore, adding another element of enrichment to their enclosure. Natural toys can be things made from wood, or you can purchase/find and sanitize ‘raw’ wood for your hamster to climb on and hide under.
  • Live plants are something very few people add to their hamster’s cages. Live plants must be chosen carefully after much research to ensure they are not harmful to your hamster, however many plants and herbs are very beneficial to small animals. They can help with digestion, clean the air, be an optional little fresh snack, and provide colour and texture to the cage. One thing to note when having live plants in a cage is that they need to be potted and the pot should be topped off with some pebbles to prevent your hamster from burrowing into the roots of the plant, or eating the roots, which could be harmful to your pet.
  • Chew toys are a requirement of small animals. Their teeth grow constantly, and by providing safe chews, their teeth will stay nice and trim. If your hamster does not have access to chew toys their teeth will become overgrown, and require a trimming procedure done by an exotic veterinarian. There are many types of chew toys, the most popular being wood chews or safe dog chews. To encourage a reluctant hamster to chew, try smearing peanut butter into the chew. Some hamsters will chew things when they know they need to, and will not require encouragement.
  • Use multiple and/or natural substrates in your hamster cage, such as organic soil, paper-based substrate, safe wood shavings, corn bits, coconut soil, and sand. These are all wonderful substrates for hamsters that provide texture and enrichment to their home. Usually you’ll have a main substrate with an additional substrate or two. The main substrate needs to be 6+ inches deep and hold burrows decently. Most secondary substrates don’t hold burrows, but can be provided in a small section of the cage, or in a dig-box.
  • A chambered hideout is actually a hamster-necessity in some countries! I really recommend purchasing or DIYing a chambered hideout for your hamster. Chambered hideouts provide a place for your hamster to nest/sleep, hide food, groom, and ‘do their business’ in a private and organized place, as a wild hamster would in a burrow.
  • Rocks and/or pebbles should be added to an area to prevent overgrown nails. You can purchase rocks/pebbles, or get them from outside and sanitize them. Please research proper sanitation methods to ensure your hamster isn’t exposed to anything harmful.

Setting Up a Natural Enclosure

Once you have decided and gathered what natural materials you want to use in your hamster’s enclosure, it’s time to set up your hamster new and improved enclosure!

In preparation for the upgrade, try putting the natural toys in your hamster’s current cage/setup. This will get their scent onto the toys, making the transition less stressful.

Empty the old cage/set up the new cage, and wipe it down. Put down 6+ inches of substrate, and start putting things into the cage, starting with the necessities (wheel, 3+ hideouts, water source, rocks/pebbles).

Fill in any ‘blank’ spaces with some plants, wood pieces, dig boxes/sections, and toys. Have climbing, hiding, and foraging toys. Provide variety. Hamsters prefer semi-crowded places, because they feel safer. Fill in the gaps, but leave walking room.

Setting up a hamster cage is a skill. It takes practice to set up a beautiful and enriching cage for a hamster. I’m still working on this skill! If you’re looking for natural enclosure setup inspiration, I recommend looking up German hamster cage setups (they’re amazing!).

Conclusion

Natural enclosures are incredibly enriching for small pets, and they’re the best option. Mimicking your hamsters wild environment promotes their natural instincts, making them overall happier and healthier.

I hope this post was helpful and informative! It was really interesting to do the research for this post, and I recommend looking at the sources and posts I have linked below to learn more about natural enclosures. If you know of any other resources feel free to share them in the Reply section at the bottom of this post!

If you’re interested in more hamster-related content be sure to like this post and follow the blog, and I’ll be back on Tuesday with more small pet care, DIYs, recipes, cage setups, stories and more, have a ham-tastic day!

Sources

YouTube Videos:

Forum Threads:

Related Posts:

DIY Two-Story Popsicle Stick Apartment Tutorial (For Dwarf Hamsters)

Hello and welcome to this week’s post! I recently purchased a few different sizes of popsicle sticks from my local dollar store, and I was very eager to create something with them.

After some thought I designed this house, with a second story and a removable lid for easier cleaning. The stilts are for submerging in substrate to prevent the house from moving or crushing a burrowing hamster.

‘For Dwarf Hamsters,’ is not a suggestion; this DIY is not a suitable size for Syrian/Chinese hamsters.

You’ll Need:

  • A hot glue gun
  • Hot glue sticks
  • Craft knife
  • Scissors
  • 12″ skewers
  • Wire cutters (makes cutting skewers easier)
  • Toothpicks
  • 2″ mini popsicle sticks
  • 4 1/2″ regular popsicle sticks
  • 5 1/2″ coffee stirrers
  • 6″ medium popsicle sticks
  • 8″ large popsicle sticks

First we’ll make the second floor and start the roof. Make two platforms. Use 6″ medium popsicle sticks as supports for the 4 1/2″ regular popsicle sticks. Leave one regular stick off the end of one platform.

Using scissors, cut through five sticks about 2-3″ apart to make a hole (doorway) in the platform you left a stick off of.

Glue a regular stick at the end of the platform to create a perfect square hole in the platform.

Glue a mini popsicle stick on the underside of the platform alongside the door (for support).

The two platforms should look like this (the support sticks will be inward-facing, so they won’t be seen once the house is done).

Repeat this process, but use large sticks instead of medium for the supports to make the platforms longer (taller, when stood up).

Your two larger platforms should look like this. These are the front/back walls.

Now make two giant platforms with medium sticks for supports and large sticks for the surface area. These will be the sides.

Next, make a ramp to access the second floor. Glue mini sticks across two coffee stirrers to make a long platform.

Flip the long ramp-to-be over. Using your scissors, trim the sharp tips off several toothpicks and glue them to the ramp for treads.

Remember the platform that’s identical to the second-story floor platform? That’s the lid (roof), but it needs some adjustments to keep it from falling off.

Trim the rounded ends off three medium-sizes sticks. Glue them on the underside of the platform, 1-2 inches apart.

Cut two pieces of skewer about 2″ long. Glue them vertically on the middle medium stick on the outer edge of the platform.

Using a craft knife, cut a medium stick in half (lengthwise). Glue the halves across the protruding ends of the three trimmed medium sticks.

Time for assembly! Take your two pieces with holes (doors), and one large platform. Glue them together as shown above.

Glue the back wall across from the front door.

Glue the ramp in so it leads to the second-story doorway.

Glue the second large platform across from the installed one to complete the walls.

Adjust the lid onto the house. To keep it secure, glue a few regular sticks around the lid ends as shown above (left/front, right/back). To remove the lid, lift/slide it back.

When closed, the roof/lid should look like this, with a sleek and modern vibe.

Open up the roof and fill any gaps with sticks and/or glue to prevent caught limbs. You can also paint the interior with a hamster-safe varnish, such as Mod Podge, to make the house last longer if you’d like.

And finally, cut the sharp-ends from four skewers and glue them along the corners of the house. There should be a few inches sticking down still.

And that wraps up this week’s post. I hope you enjoyed this tutorial; if you recreated this for your Dwarf Hamster please comment below to share your experience and results!

If you’re interested in more hamster-related content be sure to like this post and follow the blog, and I’ll be back on Tuesday with more small pet care, DIYs, recipes, cage setups, stories and more, have a ham-tastic day!

Where To (And To Not!) Adopt a Hamster

Since I’m going to be adopting a hamster within the next month or two, I thought this post idea would be perfect! I could learn a bit more about this topic, and share this information with y’all 🙂 I hope you enjoy!

When looking to adopt a hamster most people automatically go to a pet store, but are there better options? What makes those options better? How do you know if an option is “good?” Today we’ll be talking about why supporting pet stores isn’t the best choice and offering ideas for places to find a hamster to adopt.

Pet Store Hamsters

Hamsters from pet stores usually appear happy and healthy, but the big picture is not as happy as you’d think. Hamsters in pet stores are mass-bred in ‘factories’ called ‘rodent mills.’ The goal of rodent mills is making money, which is how business works, but there are ways to make money without mistreating animals. The hamsters are kept in overcrowded conditions on an unhealthy diet. The cramped, overcrowded cages quickly become filthy with urine and feces. The hamsters are being bred and rebred with terrible genetics, resulting in sickly, mentally ill, and even dying hamsters.

When the few ‘healthy’ hamsters are weaned, they’re shipped to stores in such a way that many die in transport.

A common thought is that purchasing a hamster from a pet store is rescuing the hamster from those terrible conditions, and to a degree, this is true. You are improving the life of that one hamster. But when we once again look at the big picture, your purchasing that hamster tells the store there’s a demand, resulting in more hamsters being mass-bred and sold to the store.

Not purchasing a hamster from a store is not going to put them out of business, and that’s not the point. The point is that by not supporting rodent mills those can become less popular, resulting in more hamsters coming from ethical breeders with better genetics, health, and happiness overall.

Better Places to Adopt Hamsters

So where do you get a hamster from? Here are a few ideas:

  • Buy and Sell websites such as Craigslist, Kijiji, and occasionally Facebook Marketplace will have hamsters available for rehoming. These hamsters are usually from pet stores, however, you’re not giving your money to the rodent mill. It’s going to a regular person, who can’t take care of their hamster anymore. Most of the hamsters on these sites aren’t properly cared for, so by adopting a hamster from a site you can give them a new and improved life. Always take a person or two with you to the pickup, for safety reasons.
  • Ethical breeders breed hamsters, but they do it humanely and are worth supporting. Their hamsters are usually more expensive, however they do have good genetics and a healthy back round, and there’s a lower chance of that hamster needing expensive medical attention in the future. Ethical breeders will also usually get you to sign a contract saying you’ll return the hamster to them should you be unable to keep it in the future. They make sure the hamsters go to good homes.
  • Animal shelters will usually have a few hamsters needing homes, and I’d recommend googling for shelters in your area. They’ll probably have an adoption fee, which supports the shelter so they can care for more animals in need 🙂

So those are places you should get hamsters, but I wanted to mention another place you shouldn’t adopt a hamster from…

Backyard Breeders

Now when it comes to adopting hamsters from buy and sell websites (i.e. Craigslist, Kijiji, Facebook Marketplace) there are usually several backyard breeders in the mix. Backyard breeders are similar to unethical breeders and rodent mills, who are breeding hamsters for profit, but inhumanely. The main difference is backyard breeders typically have their ‘hamster factory’ in their garage or basement.

Hamster breeding should be left to ethical breeders who properly care for and healthily breed their hamsters. Supporting backyard breeders promotes unethical (inhumane) breeding of hamsters, and should not be supported with your business. How do you tell if someone is a backyard breeder? Here are some tips:

  • The ad states they have only young hamsters available, as they would keep adults for breeding.
  • The same person (check the username) has several ads for young hamsters across the buy and sell platform(s).
  • They don’t have pictures available/won’t send photos if asked.
  • They have a multitude of baby hamsters!

In many cases where someone is advertising young hamsters, they are a backyard breeder. But sometimes an uninformed person will unwittingly have opposite sex hamsters together, resulting in an accidental litter…

Accidental Litters

Housing hamsters together is not recommended (even for dwarfs), simply because in a domestic environment they don’t benefit from the company. But sometimes people do house hamsters together, which can result in an accidental litter of hamsters, should they be opposite sexes. The owners didn’t want to breed hamsters, so they try to rehome them quickly by advertising the pups (baby hamsters) all over.

People with accidental litters more often than not are uninformed about hamsters, and the hamsters aren’t in proper living conditions.

Give people the benefit of the doubt; if you’re interested in an ad for young hamsters, feel free to message the advertiser and inquire if it’s an accidental litter, but do so kindly (don’t accuse them or shame them for letting their hamsters breed).

Sometimes you can improve someone’s life by taking a hamster off their hands, and even the lives of their other hamsters! Offer to help them out, and maybe write out a list of hamster care resources for them to check out. If you are kind and helpful you may make a new friend!

Conclusion

Where you adopt your hamster shouldn’t be taken lightly. Looking into different places to adopt a hamster is very important; you can find a hamster in desperate need of a better home while at the same time not supporting unethical breeders.

Please leave a comment in the ‘Reply Section’ down below and let me know where you adopted/purchased your hamster, or plan to adopt them! For the record, Beanie was a pet store hamster.

I hope this post was educational and helpful for those looking into adopting a hamster! If you’re interested in more hamster-related content be sure to like this post and follow the blog, and I’ll be back on Tuesday with more small pet care, DIYs, recipes, cage setups, stories and more, have a ham-tastic day!

Popsicle Stick Bridge DIY Tutorial

Greetings! This week I will be demonstrating how I created this really neat popsicle stick bridge for small pets.

This toy is inspired by those rainbow-bridge toys, which I’ve tried making before. However, I find it is very difficult to get the rails right when I try with cardboard, so I wanted to try it with popsicle sticks. Personally, I’m quite pleased with the results!

The awesome thing about using popsicle sticks for hamster toys is that you can make the same toy for different species by using a different size of sticks. The bridge on the right is made with large popsicle sticks, making it the perfect size for Syrian hamsters, while the one on the left made with regular sized sticks are perfect for Chinese and Dwarf hamsters.

  • First measure and cut 5 popsicle sticks. How long they are will determine how wide the bridge is, and you can make it however big or small you’d like. I made mine 5 inches long, for context.
  • Overlap 2 sticks as shown above. Get your writing utensil and draw a vertical line, and cut on the line. Repeat this step until you can four sticks with angled pieces cut off of them.
  • Now you should have 9 pieces that look like this.
  • Glue the pointy-looking pieces together.
  • Lay one of the pointy pieces down and glue a straight piece on to make the top step. Hold it upright until the glue cools, then glue the other pointy piece on the other end of the top step.
  • Glue the remaining four steps on, try to keep them evenly spaced.

The bridge is done and ready to put into your pet’s cage 🥳

Thanks so much for viewing this DIY tutorial! If you’d like to see this DIY in a cage setup, click here. If you’ve made this toy, comment in the ‘Reply’ section down below and share your experience!

If you’re interested in more hamster-related content be sure to like this post and follow the blog, and I’ll be back on Tuesday with more small pet care, DIYs, recipes, cage setups, stories and more, have a ham-tastic day!

Pet Sitters

Welcome to this week’s post, where we’ll be discussing pet sitters! Do you actually need one? How do you select a sitter? How do you prepare for a pet sitter? What do they need to do in your absence (1-14+ day absences)? These questions and more discussed in this post.

It seems complicated, but remember this post is written for everybody, and only a few sections will apply to you. However, I do recommend reading this whole post, and doing some research from other sources about travel with hamsters and pet sitters so you can work out the best option for your situation.

I hope this provides some assurance, so you can relax and know your hammy’s alive and well while you’re on vacation or at that conference.

Do You Need A Pet Sitter?

The need for a pet sitter depends on how long you’re going away. Your hamster will be okay for a maximum of three days without care. In preparation for a three day absence do a spot clean, tidy up, and give extra food and water sources.

If you’re going away for over three days, you need a sitter.

Picking a Sitter

When selecting someone to tend your hamster, there are a few options:

  • Asking a friend/family member to pet sit
  • Hire a professional pet sitter

Expect to be paying the sitter, whether you know them or not.

When picking a pet sitter, a few things must be considered:

  • Do you trust the person?
  • Are they responsible?
  • Do they have a good reputation/references?
  • Are they comfortable with your hamster?
  • Are they comfortable/capable to do all the required chores?

Remember this person is going to have unlimited access to your home while you’re not there. Choose carefully. Trust your gut feeling.

What Does the Sitter Need To Do?

You want to keep your hamster’s routine as similar as possible while you’re away. You may already have everything planned out for the sitter, but if you don’t know where to start, here are some ideas.

  • 1-7 Days Away: Come on days 2, 4, and 6. Feed replace with amount of seed mix on those days, clean/refill water(s), tidy cage, check on hamster (ensure alive and well).
  • 1-14 Days Away: Come on days 2, 4, 6, 8, 10, 12, and 14. Feed replace with amount of seed mix on those days, clean/refill water(s), spot clean on days 6 and 12, tidy cage, interact with hamster (leave information on usual playtime routine).

If you’d like, you can copy these sections, edit in an email, and send it to your pet sitter 🙂

In Preparation for Pet Sitter

Before you leave you should take care of everything you can to make everybody’s experience better. Do as much as you can before leaving so the sitter’s job is easier. Your hamster is probably used to your way of doing things, and would prefer you do their care routine. Here are some suggestions before you leave.

  • Feed your hamster enough to last until the sitter comes. Don’t overfeed; the food will get stale or your hamster will overeat.
  • Clean/refill their water, and add an extra water source.
  • Spot clean (get rid of all urine spots).
  • Tidy the cage, maybe rearrange it a bit to prevent boredom.
  • Add some extra chews and boredom breakers.
  • Spend some quality time with your hamster on the last few days before the trip. Whatever qualifies as quality time with your hamster (playpen time, direct interaction, hand feeding, etc…).
  • Write down what you’d usually do in the time you’re going to be away. Make sure it’s very detailed, but don’t add extra chores for the sitter. Email the list to the sitter, and print a copy to leave on the cage.

Have the Sitter Over Before You Leave

I recommend inviting the sitter to your house once before you leave so you can meet them, answer any questions, and demonstrate the required chores in question. That way they’ll be prepared and able to

You’re Away 14+ Days

Say you’re going away for over 14 days (two weeks). In this situation you have three options:

  • The sitter comes to your house every other day, which can be impractical for the sitter for such a long period of time, but for extra pay they may be willing.
  • You don’t have a sitter, but instead bring your hamster with you. Maybe research into travel with hamsters, see if this is an option. Your hamster may not be permitted where you’re going.
  • You drop your hamster off at the sitter’s house. Your hamster could have daily care/attention. No travel time for the sitter. Just make sure the sitter’s home is safe before agreeing to this option.

Please research further into these topics before continuing with any of these options. When talking about the well-being of an animal, all options must be taken into serious consideration.

Conclusion

To recap:

  • Select a sitter who is comfortable with your hamster and their care routine. Pay them, whether you know them or not.
  • Research into the topic of hamster travel and pet sitters from several sources, and work out the best option for your hamster and your situation.
  • Do as much of the ‘hard work’ before leaving. Your sitter is taking care of your hamster, not owning it.
  • Never (ever ever ever) abandon your hamster to a sitter!!

If you’re interested in more hamster-related content be sure to like this post and follow the blog, and I’ll be back on Tuesday with more small pet care, DIYs, recipes, cage setups, stories and more, have a ham-tastic day!

Different Substrates For Hamsters

There are tons of different brands of substrates, but there are only a handful of good substrates for hamsters. This week I’m going to be talking about the different materials used for hamster substrates, which ones are safe, and some popular unsafe ones as well.

Feel free to check out my sources, research resources for you, and related posts linked at the very end 🙂

Paper Based

Paper based substrates are one of the most popular varieties. There are two types of paper substrates: shredded paper (made of newspaper or tissue) and expanding, pellet-like paper-based substrate (like Carefresh or Kaytee).

Shredded paper substrates are a lot cheaper than their expanding paper-based relatives, because a lot less work goes into making them. You can actually make it yourself without too much trouble.

Newspaper shreds aren’t the best substrate because they don’t hold burrows well, control odor, or absorb urine at all, and it has been known to rub ink off onto hamsters. Shredded paper substrates made from napkins, paper towels, or toilet paper and very good options.

Commercial paper-based hamster beddings are typically on the pricier side, but are very good for holding burrows and absorbing urine. Paper-based hamster substrates are available scented, however these scented substrates are not good for your hamster’s respiratory system and should never be used.

Corn Cob Bits

Corn cob bits are sometimes used as a substrate, but there are much better options.

There is no odor control in corn cob bits, resulting in a smellier cage. Hamsters cannot burrow in corn cob bits, not to mention they aren’t comfortable to walk on.

It would be okay to use them in a small section of the cage for texture, but definitely not for the whole cage.

Wood Shavings

Wood shavings are a very popular substrate to use, and one I definitely recommend, especially for natural cage setups.

They provide texture and hold burrows reasonably well, but if you wanted stronger burrows you could definitely layer some soft hay into the substrate to improve burrows.

When selecting a wood shaving substrate make sure not to use a softwood like pine or cedar. Those woods contain naturally occurring chemicals which usually result in respiratory infections.

The most common safe shaving is Aspen, but there are tons of other safe options such as:

  • apple
  • arbutus
  • ash
  • bamboo
  • blackberry
  • blackcurrant
  • cholla
  • cottonwood
  • crabapple
  • dogwood
  • elm
  • grapevine
  • hawthorn
  • hazelnut
  • kiwi
  • magnolia
  • manzanita
  • mulberry
  • pear
  • pecan
  • pine – kiln-dried white
  • poplar
  • quince
  • rose hip
  • sycamore
  • willow (but not white willow)

So as you can see, there are tons of hamster-safe wood shavings out there, but there are also tons of unsafe woods, including:

  • almond
  • apricot
  • beech
  • birch
  • black locust
  • black lotus
  • blackwood
  • box elder
  • buckthorn
  • cashew
  • cedar
  • cherry
  • chestnut
  • chinaberry Chinese snake tree chokeberry
  • citrus woods – orange, lemon, grapefruit, etc.
  • cypress
  • ebony
  • elderberry
  • eucalyptus
  • fir
  • ginkgo
  • hemlock
  • holly
  • honey locust
  • hydrangea
  • juniper
  • kumquat
  • laurel
  • mahogany
  • mango
  • manufactured/glued woods like plywood or fiberboard
  • maple
  • mesquite
  • myrtle
  • nectarine
  • oak
  • oleander
  • peach
  • pine – fresh, pressure treated, red — kiln dried is thought to be safe
  • pinecones
  • pistachio
  • plum
  • redwood
  • sandalwood
  • sequoia
  • spruce
  • teak
  • walnut
  • weeping fig
  • white willow
  • yew

Those are all unsafe woods.

*Thank you so much kirani100 on the Hamster Hideout forum for those lists!

Coconut Based Substrates

There are many different coconut based substrates, such as EcoEarth (coconut-based dirt), coconut fiber, and coconut chippings.

Ingredient-wise these are all safe substrates, however, there have been cases of hamsters getting tangled in coconut fibers, hence why I personally wouldn’t use it. It’s very similar to cotton nesting, which is made of thin strands which wind around limbs or get stuck in cheek pouches and teeth.

EcoEarth is very safe, and I have used it for my past hamster Beanie without any problems. It doesn’t have long, dangerous strands in it, and is excellent for adding texture. When it’s dry it does not hold burrows, so I wouldn’t recommend using it for the whole cage.

Litters/Gravels

Sometimes I see people use litters or gravels in their hamster cages. Gravel is not recommended because it’s not comfortable to walk on and it’s not good for burrowing at all.

Litters similar to gravel or grit are not good either for the same reasons. A litter you can use is wood pellet cat litter. ErinsAnimals on YouTube mixes pelleted litters with other substrates which is apparently great for odor control. Using it as a main substrate is not recommended because hamsters cannot create burrows in pellets.

Soil

Soil is an amazing substrate for hamsters. When packed down it is great for burrowing, and mimics their natural habitat, creating a more enriching enclosure.

Soil can be used as the main substrate because of the burrow-bility (new word). It does not have very good odor control, but personally I would love to try it with my future hamster since I don’t really mind hamster-smells.

When selecting soil for your hamster check the packaging and make sure it does not contain any fertilizers (typically called ‘organic soil’). It is normal for there to be little white pebbly-things in organic soil; they are natural minerals which are harmless hamsters.

Conclusion

There are many options of substrates for hamsters, safe and unsafe. When choosing substrate for your hamster it is crucial that you research that specific substrate to determine whether or not it’s a healthy, beneficial choice.

YouTube videos, hamster forums, and some blogs are good places to gather information. Always collect information from several sources to ensure the information is up-to-date.

If you know of any other interesting substrates, safe or unsafe, please share your experience and/or knowledge with us in the Reply section below!

If you’re interested in more hamster-related content be sure to like this post and follow the blog, and I’ll be back on Tuesday with more small pet care, DIYs, recipes, cage setups, stories and more, have a ham-tastic day!

Sources

Research Resources for You:

Related Posts

Design a site like this with WordPress.com
Get started