How To Sanitize Hamster Toys

Hamsters, and other small pets, can get their toys pretty dirty. Your hamster’s toys should be getting cleaned after they’re switched out of the cage for different toys, or on a monthly basis.

There are two categories of toys; the plastic toys and the natural toys. They have different cleaning methods, and here I’ll explain the easiest ways to clean your plastic and natural toys, with some safe, homemade cleaners.

The Best Pet-Safe Cleaners

When you think of a pet-safe cleaner a spray bottle from the pet store probably comes to mind. Those ‘pet-safe’ cleaners are sometimes harmful to hamsters due to the chemicals and strong scents. Hamsters, and other small animals, have very sensitive respiratory systems, and these sprays could easily be harmful to your small pet.

Well, if a store bought cleaner shouldn’t be used, then what should? Well there are two main cleaners small pet owners use, the first is dishsoap and warm water. Dish soap and warm water are a safe cleaner to use, however I wouldn’t recommend using a strong citrus scented soap. This mix is especially good for soaking items with a strong odor. You will want to thoroughly rinse the items with water after using soap.

The second cleaner is vinegar and water. There are many different solutions of vinegar and water, 50/50, 1/3, or 1/4 for example. You don’t want to be using plain vinegar, because the smell would be overpowering. Only use White Vinegar, no other kind is suitable. Since the solution is watered down it doesn’t necessarily need rinsing, but you can if you’d like.

Plastic: Method #1

The first method of cleaning plastic is soaking it in warm soapy water. This method is very effective for removing stuck-on urine, or deodorizing items. Simply get a tub or bowl suitably sized for the items, and soak them in the suddy water. Rinse well after, and drip-drying or toweling off the items is fine.

Plastic: Method #2

The second method of plastic cleaning is using a vinegar/water solution. What I find works best is putting the mix in a spray bottle and spraying the items down. Leave them to soak for a few minutes, and rinse with plain water if desired. Either drip-dry or towel off the items until dry. This method seems to work well for sanitizing items that have pee on them, but isn’t as good in the deodorizing department.

Natural: Method #1

Method one of cleaning natural items is baking. I’ve baked wood before, and I have some advice for you: don’t bake your wood at a higher temperature than 350, or you may experience some levels of smoke, like I did. I don’t want to discourage this method of sanitizing, I just recommend baking natural items at 350f for about 30 minutes, and stay nearby. Baking is a great way to kill germs, but it does not deodorize or remove urine, so if that’s what you’re looking to do check out this next cleaning method.

Natural: Method #2

The best way to sanitize, deodorize, and remove urine from natural, wooden toys is to soak them in a vinegar/water solution. The mix should be 50/50 water and vinegar. Get a large enough tub or bowl for the items, and soak the toys for about 1-2 hours. You will need to get them dry ASAP, so put them on a rack, and if possible by a heater or fan.

Summary

  • Clean your pet’s toys on a monthly basis.
  • Store bought cleaners can be harmful due to chemicals and strong odors.
  • You can clean plastic toys with soap/warm water or a vinegar/water solution.
  • Natural items can be sanitized by baking them at 350f for about 30 minutes.
  • Another way to clean natural toys is by soaking them in a vinegar/water solution for 1-2 hours, and drip-drying them.

I love hearing about people taking care of their pets, if you currently or just started using any of these methods leave your experiences down below in the comments. If you’re interested in more hamster-related content be sure to like this post and follow the blog, and I’ll be back on Tuesday with more small pet care, DIYs, recipes, cage setups, stories and more, have a ham-tastic day!

The May Cage Makeover (2020)

Beanie Awaiting Her New Setup

Welcome to the 2020 May Makeover! The first post of each month is a makeover, consisting of the deep clean and new DIY based setup! This series is intended to inspire those trying to make neat DIY based setups. Enjoy!

I will be linking all my posts related to this post later, so read to the end!

Here is Beanie’s current setup. There’s her water, rock, tubes, wheel, food dish, Bran-Bowl, her nest box, some random DIYs and a buried plastic barn. Let’s get started!

  • The first step is to remove everything.
  • I put Beanie in her 10 gallon holding tank.
  • Next I scooped out all the bedding, and sanitized the bin with a vinegar/water solution.
  • Add in fresh bedding with some old bedding for a familiar scent.
  • Now I added her wheel, rock, some tissue to go under her water dish, a platform-like piece of wood, and a hollowed out crescent-shaped piece of bark, which I had found outside.
  • Next I added a food bowl and her Bran-Bowl. I scatter feed Beanie, but also add some food in a dish for good measure.
  • After I just added some different DIYs, including the Two-Tiered Tower, small bendy-bridge, and a simple popsicle stick ramp.

And now for the final touch ups!

  • I scattered food around in little heaps.
  • Then I shredded some tissue for nesting material, and piled it by the bark -cave.
  • After cleaning her water bottle and dish I added those in.

And here’s the makeover results! This setup looks quite natural, and I was very excited to use the bark cave I found outside, and I think it looks really neat!

Links:

Thank you so much for reading, I hope you enjoyed this post! If you’re interested in more hamster-related content be sure to like this post and follow the blog, and I’ll be back on Tuesday with more small pet care, DIYs, recipes, cage setups, stories and more, have a ham-tastic day!

My Experiences Baking Wood

I’m going to tell you about my experiences baking (and burning) wood for my hamster, Beanie.

The most common method of sanitizing natural or wooden toys is baking them, and I had a nice piece of wood I wanted for Beanie. I was a newbie hamster owner, and had never baked wood before, and I decided I might as well give it a try.

I didn’t know exactly what to do after resolving to bake the wood, so I Googled, ‘how to bake wood for my hamster?’

After some digging around I came up with 30 minutes at 425f, and I preheated my oven. I stuck the wood in and after about 20 minutes I realized the oven was smoking.

I dashed to the oven and retrieved the wood, which was definitely sanitized (a little smoked, too).

It survived the oven without turning to charcoal, and to this day Beanie uses this piece of wood, and I really like it.

My Second Wood-Baking Experience

The second time was far less exciting. I found some nice pieces of wood outside, and I wanted to use them for Beanie, so I needed to bake them.

I decided to bake the wood at 350f for 20 minutes, so it wouldn’t start smoking.

The baking went fine, except for 15 minutes it started to smell, and I took the pieces out and called it a day.

Summary

Baking wood is an easy and effective way of sanitizing natural hamster items, and I highly recommend it. However, if you don’t want a smokey situation (which most people don’t) I’d recommend baking at 225f for 20 minutes.

Have you had any wood baking incidents? Feel free to share them in the comments so we can learn from each other’s experiences!

If you’re interested in more hamster-related content be sure to like this post and follow the blog, and I’ll be back on Tuesday with more small pet care, DIYs, recipes, cage setups, stories and more, have a ham-tastic day!

Annoying Things Beanie Does/Did

After owning a hamster for over a year I’ve realized having a hamster is something you have to learn how to do with first-hand experience. I learned as much as possible before I got Beanie, but nothing could’ve prepared me for the things Beanie’s done. Here I will tell you about the top five things Beanie does and has done that annoy me the most.

Listing things in order of least to most annoying.

Peeing Through Bars

When Beanie was in her dreadful wire cage from the first night she peed through the bars, plastering my wall in urine. It was very annoying, and my opinion on barred cages is that I will never have one again because I don’t want to be dealing with that. I love cleaning, but wiping pee off my wall is not my idea of a good time. I know every hamster is different, but I’m not risking it!

When they pee through the bars you’re not just cleaning the wall either; you have to clean the bars as well. This trait of Beanie’s was very bothersome, but is going last because Beanie no longer does it.

Wheel Peeing

Ever since I purchased Beanie a large, solid surface wheel she has peed in it every night. “Yes Beanie, I know you like the smell, but have mercy on me!” And even if she likes the smell, I still feel like she dosen’t enjoy running in her own urine. Every day when I do my spot-cleaning I get my pride and joy. My Professional Spray Bottle (from Dollarama, if you’d like one), and spray the interior of the wheel with a vinegar/water solution, then I wipe it dry with paper towels. I highly recommend using a spray bottle if your hamster is a wheel-peer; you can clean it without leaving the room!

The daily wheel cleans don’t take much time or effort, so it’s ranking low on the ‘Annoying Scale.’

Dumping Cheek Pouches

Once or twice Beanie has come out of her cage for playtime with food in her cheeks. I now try to avoid this after the first real incident.

It was getting later and later in the evening, and I didn’t want to wait much longer for Beanie to dump her food out before her playtime. Her pouches were noticeably full, but I was going to risk it and let her out.

Beanie went under the door into my storage closet, and while I was working in the room I noticed Beanie was awfully quiet. I realized she was stuck in the back of my tiny, packed storage closet, and couldn’t get out.

After carefully moving several things Beanie came crawling out, with her cheeks empty. Nooooo! I pulled some more stuff out to reveal the mound of food in the far corner of the closet. Beanie dumped her food to try to get out. Wonderful.

My little broom couldn’t get the food, so I resorted to grabbing it with my bare hand. Bleh, gross! The food was kinda slimy, and really disgusting to touch, so I used the mini broom to get it the rest of the way out.

After replacing the stuff in the closet, and hamster proofing it more, I let Beanie back out for some more playtime. To this day I refuse to let Beanie out with cheeked food.

Sleeping Out In The Open

This is something that drives me absolutely crazy. I cannot get through a day knowing Beanie is sleeping out in the open instead of in a hut. I want Beanie to have a good sleep, and she can’t do that when she’s sleeping out in the open.

When Beanie does this is usually after I do her weekly nest clean, or move her hides around. As of this writing she moved behind her wheel, which isn’t much coverage, so I scootched the wheel forward and fit her igloo over her.

I don’t know about you, but this would be the first thing on my ‘Annoying List’ if it wasn’t for Beanie’s most annoying trait of all.

Putting Food In Her Wheel

I’m sure many, if not all, hamsters do this at some point. They cheek their food, dump it in their wheel, and run on it. It is by far the worst noise in the world, especially when you’re trying to sleep.

But Beanie, unlike any hamster I’ve heard of, punishes me when I go to bed early and don’t play with her. I’ve just realized when I don’t play with is when she puts food in her wheel at 4 or 5am, and runs in it.

She will do this until I get out of bed and dump it out. Once she was very persistant, and refilled her wheel three times before she realized I wasn’t going to play with her. Never underestimate the intellect of a rodent!

I don’t think I’ll ever understand what goes on in Beanie’s mind. Hamsters are very complex, and every hamster has a different personality, which is amazing! Does your hamster do any of these, or any other strange things? Leave them in the comments below!

If you’re interested in more hamster-related content be sure to like this post and follow the blog, and I’ll be back on Tuesday with more small pet care, DIYs, recipes, cage setups, stories and more, have a ham-tastic day!

Hamsters and Allergies

Being allergic to fur is pretty common in humans, and many people believe there are ways to own a pet even when they have allergies (they’re called reptiles). Here all you allergenic peeps, and unallergentic peeps, can learn all about hamsters and allergies! We’ll be answering what species causes the most allergies, if you can own a non allergenic hamster, and if your hamster can have allergies!

Winter White Hamsters

Commonly referred to as Winter Whites, Djungarians, Siberian or Russian Dwarf Hamsters, the Winter White is an adorable species of dwarf hamster known for changing its coat colour from brown or grey to white in the wintertime.

Domestic Winter Whites typically don’t change colour because of artificial lighting, but if you have them in a naturally lit area the chances of your hamster’s coat changing are increased, but not gauranteed.

Winter Whites are suspected to cause far more allergic reactions than any other hamster species, probably because of their unique colour changing ability.

Alien Hamsters

Hairless, or Alien Hamsters are a breed of Syrian Hamsters which are genetically bred to not have fur. They aren’t the most attractive, but many people believe they do not cause allergies.

When you think of an Alien hamster you probably think of something that looks like a Naked Mole Rat. They basically look like a pinkish or blueish Syrian hamster (because they are Syrians), only their ears are more pronounced and their forelegs look longer, and then there’s the obvious lack of fur.

Hairless hamsters typically live about half as long as furry hamsters, and they also cause allergic reactions like any other hamster. Studies have shown that allergic reactions by hamsters are almost always caused by a chemical they secrete through their skin, and not by their actual fur.

Hamsters With Allergies?

Believe it or not, your furry (or hairless) hammy could develop allergies! Hamsters, like humans can infact be allergic to many things. Usual causes of reactions are substrates, foods, or air fresheners.

When it comes to substrates hamsters can be allergic to wood shavings or scented beddings. I’ve never heard of hamsters having reactions to plain paper bedding. Keep in mind getting a respiratory infection and having an allergic reaction are very different. Consult a vet if you think your hamster has either.

When it comes to food allergies aren’t as common. If you overfeed fruits, veggies or treats this may cause diarrhea, and that’s it. The most common causes of a reaction are Sunflower Seeds and Peanuts. A hamster’s main source of nutrients are seeds, so allergies are very rare in hamsters.

Air fresheners are pleasurable to the human nose, but not to your hamster’s, and sometimes their whole body. Whenever I have family over I always eventually hear, “It smells like pee in here!” From them; other guests are too polite. I try to fix it with daily spot cleans and an air freshener. When you pick out an air freshener that will be near small pets, or birds, which have very sensitive respiratory systems, you must be very careful. Always Google around before getting a specific one, and try to get a light smell. Personally I just use an Arm&Hammar Baking Soda Air Freshener, made for refrigerators. Soon I’ll be getting some Spider-Plants in my pet room to freshen the air.

There are many things to look for when diagnosing an allergic reaction. I personally have no experience, and recommend doing your own research and talking to your Exotic Vet.

If you’re interested in more hamster-related content be sure to like this post and follow the blog, and I’ll be back on Tuesday with more small pet care, DIYs, recipes, cage setups, stories and more, have a ham-tastic day!

Summary

  • Winter White Russian Dwarf hamsters are known to cause the most allergic reactions.
  • Winter White hamsters may change colour if only provided with natural light in the wintertime.
  • Hairless hamsters don’t live as long as ‘normal’ hamsters.
  • Hamsters cause allergic reactions from chemicals they secrete from their skin.
  • Hairless hamsters still cause allergies.
  • Hamsters can be allergic to many things including substrates, foods and air fresheners.
  • Always consult your vet if you suspect your hamster is having a reaction.

I’d like to thank Critter Chaws and Google for providing some of the listed information.

The April Cage Makeover (2020)

Welcome to the April 2020 Cage Makeover! If you’re new, the first post of every month will be a cage makeover! These makeovers consist of a deep clean and new setup mostly consisting of the DIYs I share as well. I will link the DIYs and topics (they’re in bold) I’ve created and posted at the very end, so stay tuned 😉

As you can see, Beanie’s cage has changed a lot since the March Makeover, and it’s not too exciting. The substrate levels have also lowered to 5 inches since I’ve been cleaning her nest and soiled substrate weekly, and I love deep substrate!

  • The first step is to remove everything from the cage.

As you can see I’ve left Beanie’s house where she is sleeping. I prefer let her come out on her own, which she did when I was removing the substrate.

Have a carrier or playpen to put your hamster in when you’re cleaning. I have a 10 gallon tank (‘Beanie’s Holding Cell’) where I keep her while I clean.

  • Next empty all the substrate from the cage.
  • Save at least a third of the old substrate; your hamster will smell the familiar substrate and be less stressed.
  • Wipe the interior with a pet-safe cleaner.
  • Now fill the cage with substrate. A tip is to Have 6 inches all around when you pat it down.

I personally wasn’t happy with 6 inches, so I dumped in another few inches because I could, and if you can, you should 😎

  • Next I did my usual water and wheel setup. Under my water bottle (and where the bowl will be) I have some toilet paper to absorb drips, and under that I have nice, flat rock for keeping Beanie’s claws trim. I added my small bendy bridge as a wall to keep substrate out of her wheel.
  • After it was time for the hides. I used my Luxury Hamster Home (right, July 14th), burrowing house/platform (left) and then the Barn Facade hidey, which is underground with a Pringles can tube leading down to it.
  • And then I added in four wooden pieces for a more naturalistic setup.
  • I added my Small Animal Tee-Pee.
  • Then for two Terra Cotta Pot Saucer dishes, one upside down as a mini platform-step type thing.
  • Next I scattered Beanie’s food around, and added chew toys.
Before
After

And the setup is complete! Beanie went straight to bed 😂

I hope you enjoyed and gathered some ideas for how you might like to set up your own small pet’s cage!

If you’re interested in more hamster-related content be sure to like this post and follow the blog, and I’ll be back on Tuesday with more small pet care, DIYs, recipes, cage setups, stories and more, have a ham-tastic day!

Links

The March Makeover

Small Animal Tee-Pee

Pet Cleaners

Luxury Hamster Home

Rehoming Pets

Now, before we begin I would just like to note that before you bring any pet into your home you must be prepared to care for it it’s entire life. However, sometimes your life will change, and you may be forced to rehome a pet; that’s life. Here I will discuss:

The Five Most Common Reasons For Rehoming:

  • The Caretaker Gets Bored
  • A New Baby
  • Finances
  • Moving
  • Allergies

Your Pet’s Ad:

  • How Much Information?
  • Adoption Fee?

And how to choose an adopter.

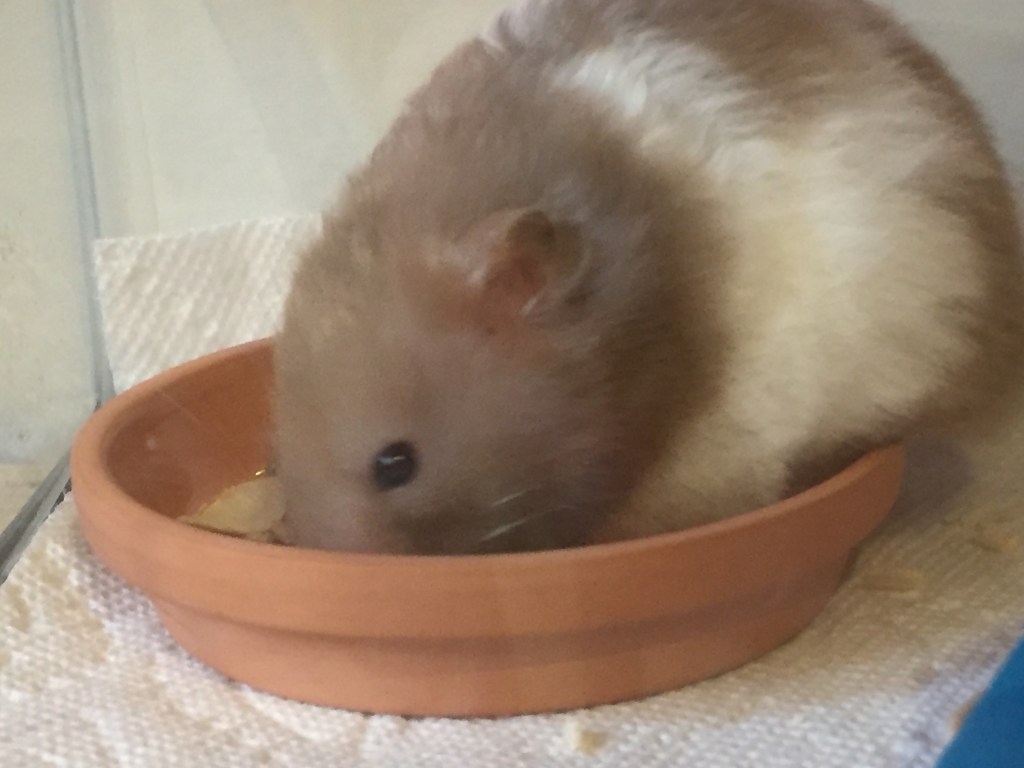
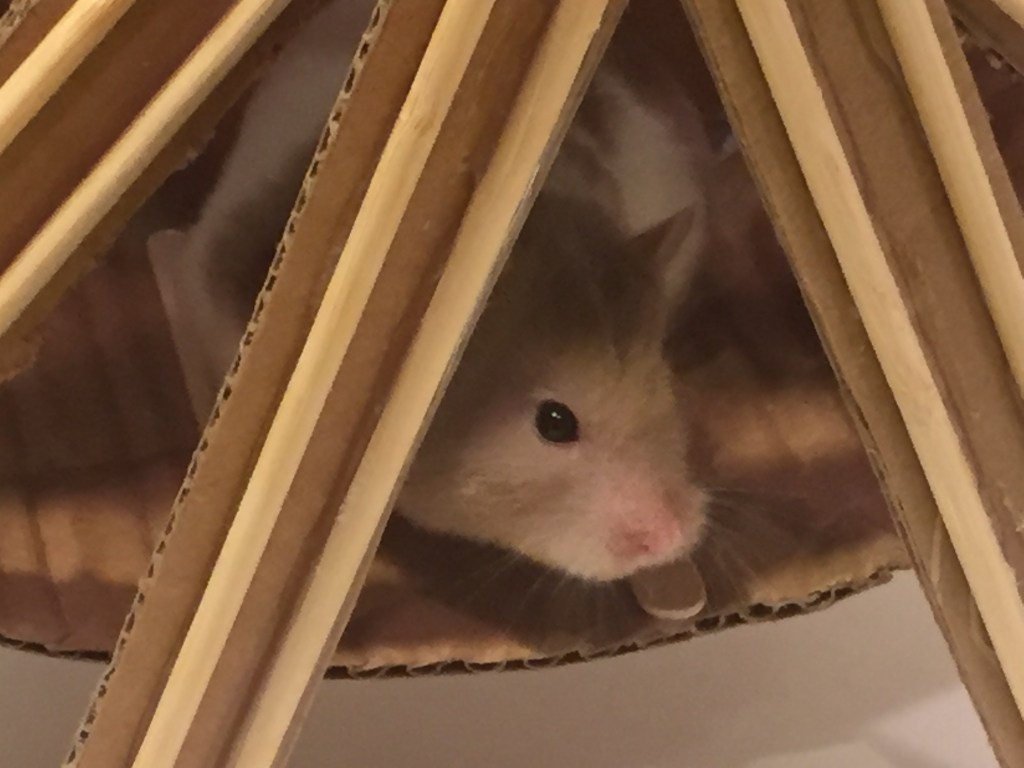
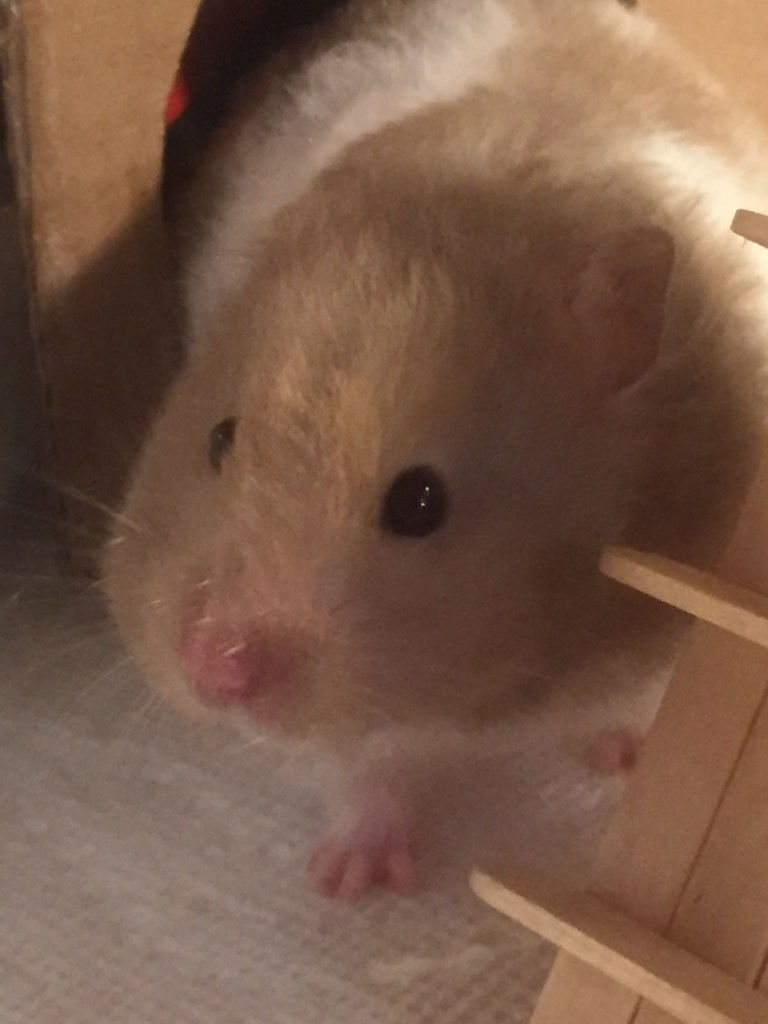
Just letting you know, I’m not writing this because I’m rehoming Beanie, but for educational purposes.

Reasons To Rehome: The Caretaker Loses Interest

Many people impulsively, or in general, get a pet because they think it’s fun. Yes, it’s fun, but if you don’t know what you’re in for you may not know what the definition of ‘fun’ in the pet-world is. A pet being fun totally depends on what kind of animal you’re looking for. If you like pets to watch, maybe an amphibian; if you like playing with your pet, maybe a dog, or if you just like the presence of an animal cats are perfect, low maintenance animals to keep you company. But when you go out and get a pet not knowing what it’s common personality traits are then that’s what usually causes boredom when owning a pet.

Being bored of a pet can cause many issues, such as forgetting about them and not taking care of them, for example. The best way to prevent these situations is by educating people about animals and their traits and care. This will prevent the most common reason to get bored of a pet, resulting in fewer pets being rehomed. If you’re in a situation where you’re bored of your pet, I recommend learning more about their species and trying a few more weeks before you post that ‘For Adoption,’ ad.

Reasons To Rehome: A New Baby

New babies are common with pet owners, and typically a stay-at-home mom cannot take care of pets and a baby. This is understandable, but I would recommend trying a few weeks before putting your pet up for adoption. It’s not fair to adopt them planning for them to spend their whole life with you, just to be given to someone else years, or even months later.

Reasons To Rehome: Finances

No one plans on losing their source of income, but it does happen. In a financial crisis if you cannot afford to properly care for your pet(s), it is best to rehome them for their well-being. When you adopt a pet you want to be caring for them the best you can, and if they’re not getting everything they require it is considered animal cruelty, so in these cases rehoming is necessary. Meanwhile, if you’re struggling with money, and your pet is getting everything it requires please consider keeping them.

Reasons To Rehome: Moving

This is a very common reason people rehome their pets, and it is reasonable depending on the pet and how far you’re going. For example, if you were moving across the country and it would take three days to get there, taking a rodent is a terrible idea due to the fact they are very stress-prone. Meanwhile, a dog or cat would probably make the trip just fine. Every animal is different; always remember to do what you believe is best for your animal; you know them best. Do not rehome your pet if you’re going on vacation; find a petsitter!

Reasons To Rehome: Allergies

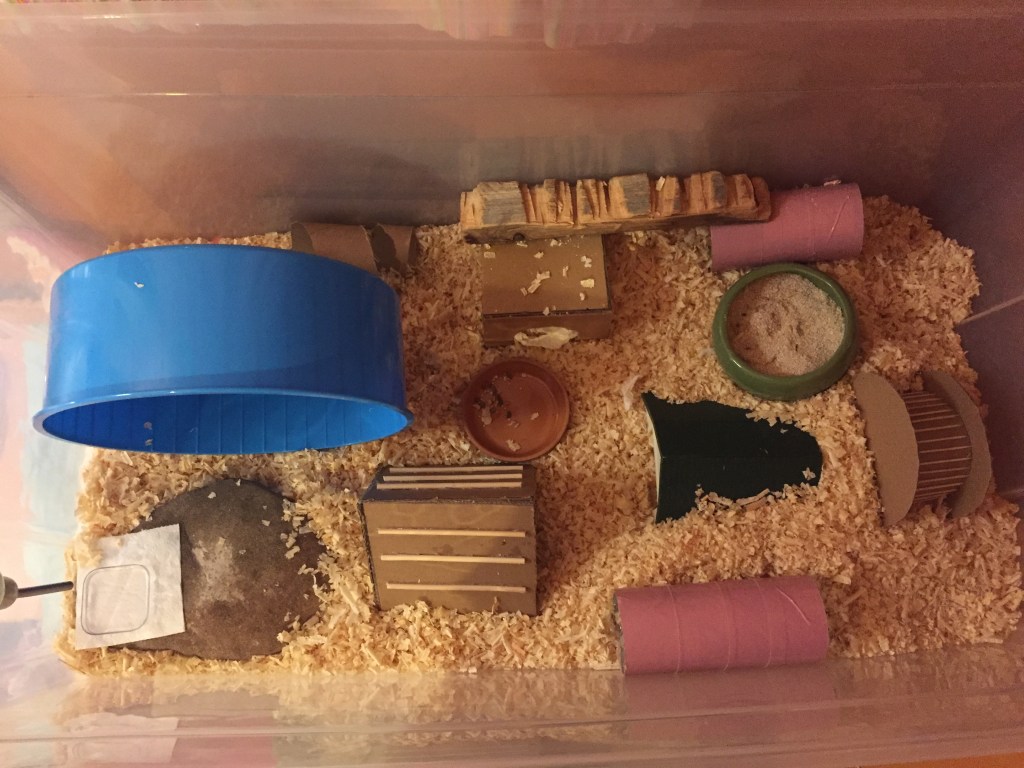
Sometimes people will adopt pets, and in the first week of owning them they realize they are allergic to the animal. These situations are sad, but are pretty reasonable. Sometimes you or a family member may develop an allergy over a week or more, and this is a valid reason to rehome, or return the animal where you got them from. A good idea is to hang out with a friend or relative’s pet before you get your own, if they have the species you’re interested in; this is a good way to see if you’re allergic. I have a post about Hamsters and Allergies, check that out here to learn more!

Creating an Ad: How Much Information?

The ad needs to be at least a paragraph long, but short enough to be read aloud within a minute; after you put the basic information the viewer will have enough info to decide whether to contact you or not. The information that you will need to include is:

  • The pet’s age.
  • Pet’s gender, or list if you’re uncertain.
  • Their species, breed, fur type or morph.
  • Where you got them from.
  • Their current diet, and their favorite treat.
  • Any health issues they’ve had.
  • Is the animal spayed/neutered?
  • Their current and previous home/enclosure.
  • Any requirements about the pet’s future home.
  • Their basic temperament.
  • Vaguely note the reason you’re rehoming.
  • Anything you’re selling/giving away with them.
  • The adoption fee.

As an example:

I have a 3 year old Shorthair Domestic Orange Tabby cat for adoption. I got him from a friend who could no longer take care of him. I currently feed him Friskies cat food, and he loves any kind of wet cat food. He’s never shown any signs of health issues, and he has been neutered. He is an indoor cat, but did come from an outdoor home. I would love for him to go to an indoor home, and he would be very comfortable with gentle, older children. He’s very friendly, and loves having his forehead scratched. He is also a shoulder-cat and enjoys riding around on people. I would love to keep him, but I’m moving very far away and it would stress him out. He comes with his favorite blanket, toys, any leftover food and his dishes. His adoption fee is $20.

Creating an Ad: Adoption Fee

An adoption fee is critical for your pet to go to a good home, for several reasons including:

  • Someone may be looking for free snake-food.
  • They may be surfing the web, see a cute animal and get it without any knowledge, resulting in your pet going to a bad home.
  • A backyard-breeder may be seeking out breeding animals, which are usually kept in improper conditions.

So there are valid reasons to add an adoption fee, and people are actually drawn to ads with adoption fees because they unwittingly want a pet they believe is valuable. However, you don’t want the fee to be super high, or super low. Typically you want the fee to be about half of what you paid for the animal, only no less then $10. I mean, it does depend on the fur type/breed/morph of the animal, but just be reasonable, you may want to cut it a bit more if you really need a home for your pet. Think of what you would be willing to pay for a pet. You also don’t want to look like you’re just trying to get your money back. I would say an average is:

  • $10 for a Hamster, Gerbil, common Amphibian, smaller bird, Rat or Mouse
  • $20 for a Guinea Pig, Sugar Glider or Cat
  • $40 for a Rabbit, common reptile, or small dog
  • $100+ for a large dog, valuable dog breed, or rare/valuable reptile morph.

The adoption fee is totally your dicision, and you can add to it if you want to charge for any supplies you’re giving away with the pet.

Choosing an Adopter

Finding a good adopter can be challenging, especially if you have a specific criteria you’d like them to meet. See if a friend or family member can take your pet first. If your friends or family cannot take your pet, you’ll start looking for adopters. Make a list of all the things you want the new home and owner to be, here’s an example:

  • Indoor home.
  • No pet snakes.
  • Older kids are fine.

So you can make your list as long or short as you want. When someone contacts you about your pet, keep an eye out for some basic tells:

  • If your adoption fee is reasonable and they try to lower it significantly (say, you’re asking $60 and they only want to pay $30).
  • If you get weird vibes from them (always trust your gut).
  • They seem uneducated about the species.
  • If they try to dodge your questions, or answer vaguely.

If the person passes this test, and you feel like they’d be a good home for you pet, then setup a meeting. Remember, you can always say no to a potential adopter if you’re not comfortable with selling your animal to them.

Meeting Adopters

When you meet up with an adopter do so in a public area if possible.

Get them to hold the animal (if it’s small enough). Animals can sense a lot, so if they don’t like the person they will let you know, just be prepared to catch them if they react badly to the person.

See how the adopter reacts to the animal. Ask them what they think, if the animal is what they expected, and if they like the animal personality, temperament and appearance wise.

You want to ask questions before the person has time to prepare an answer; that way you get their honest opinion.

Make sure you feel comfortable with the person; animals aren’t the only ones with instincts!

By using these guidelines, and your gut, I hope you can find a safe home for your beloved pet, if you absolutely must rehome them. Remember, always try to keep your pet, unless they need a new home for their well-being.

If you’re interested in hamster-related content be sure to like this post and follow the blog, and I’ll be back on Tuesday with more small pet care, DIYs, recipes, cage setups, stories and more, have a ham-tastic day!

Summary:

  • Repeatedly go through your reason(s) to rehome; are they reasonable?
  • When creating an ad go through my checklist and make sure you have adequate information.
  • The ad should take about a minute to read aloud.
  • Always trust your instincts when choosing an adopter; if you have a bad feeling about them follow your gut.
  • You always want to be trying to keep your animal(s).
  • Only ever rehome a pet for their well-being.

Keeping Hamsters Safe From Other Pets

There’s no reason you can’t own other pets besides your hamster. In this post we’re going to discuss the easiest ways to keep your hamster safe from the other pets in your home, no matter what they are.

24/7 Free Roaming Pets

There are many species of animal that thrive by living the free-roaming life. There are quite a few. Dogs, cats, ferrets and rabbits for example should all be living outside of cages, with the exception of caging them at night, if you’re afraid of them destroying things.

The best way to protect any caged pet is to keep them in a bedroom or office with a secure, latching door to prevent your other pets from getting at them. This is why many people have a ‘pet room,’ where they keep all their caged pets. Bedrooms and offices are ideal places for housing your hamster in general because they’re quiet and peaceful so they can get a good day’s sleep.

Every pet is different, but if your pet has no idea of the existence of your hamster you could probably get away with having them out in the open. Hamsters are crepuscular and/or nocturnal, so it’s likely your pets won’t notice the hamster, and if they’re kept out of sight of the cage at night it shouldn’t be an issue.The cage will need a stable, latchable lid either way. Hamsters are known to escape.

Caged Pets

Having other caged pets is rarely a problem with hamsters. However it has been known highly territorial hamsters sometimes try to attack other hamsters through the cage, barred or solid. This problem can be easily be fixed by taping a sheet of paper on the side of the cage, or moving the cage.

If you have multiple hamsters, or perhaps a snake or lizard, in the same room you may worry that, “My hamster will get out and attack the other hamster!” Or, “What if my snake eats my hamster?” This isn’t worth worrying about. Obviously you’re going to hamster proof the cages (right?), or whatever-proof any other cages in the room, and you should be peachy.

If you’re interested in more hamster-related content be sure to like this post and follow the blog, and I’ll be back on Tuesday with more small pet care, DIYs, recipes, cage setups, stories and more, have a ham-tastic day!

Summary

  • Don’t be afraid to keep other pets as well as your hamster.
  • Try to keep the cage in a bedroom or office with a sturdy, latching door.
  • It’s fine to keep the hamster out in the open so long as you make sure the cage has a strong, latching lid and your other pets don’t care about the hamster.
  • If your hamster tries to attack other caged pets beside them put a piece of paper between the cage or move the cage.
  • Don’t worry too much about caged pets getting out and harming each other.
  • Check all cages weekly to make sure your pets can’t get out/get at each other.

Beanie’s Wheels

Written By Laura Grace

March 7th 2020

I purchased Beanie’s first cage from a buy and sell website, and it came with several other items, including a wheel. The wheel was a navy blue, eight inch mesh wheel. I had done my research and knew very well mesh wheels caused Bumblefoot, so I had my solution all planned out.

Preventing Bumblefoot

I measured the circumference and width of the wheel and cut a piece of cardboard to fit it. Then I got a wet paper towel and rubbed it on the top layer of the cardboard. I then carefully ripped off the flat top layer of brown paper from the cardboard. That left me with a perfectly fitted, wavey, grippy cardboard liner for the wheel.I was very pleased with my work. I got some black electrical tape and taped the liner into place on the wheel.

Throughout the month and a half I used that wheel I only needed to replace the liner once. It worked like a charm, and Beanie showed no signs of foot pain. Eventually Beanie outgrew the wheel, as expected, so I began to search for an upgrade.

Finding an Upgrade

I had a few criteria I wanted to meet for the wheel:

  • Ten inch
  • Solid surface
  • $20 or less
  • Decent reviews

I couldn’t find anything to meet my requirements, and I’d almost given up hope when a friend said, “Why don’t you get a twelve inch?” And to this day I don’t know why having a ten inch was such a huge deal to me. I looked once more, and finally ordered a twelve inch Comfort Wheel. I’d heard good things about it, and unlike Silent Spinners, I’d never heard of one falling apart.

Upgrades For Beanie

About two days before the Comfort wheel came in the mail Beanie moved into the 410 square inch aquarium. She was bathing in space, and I was delighted when her wheel came a few days earlier than expected. I hurried out of the post office with the box and ripped it open as soon as I got to my car; I knew I didn’t want the burgundy wheel, anything but burgundy. To my delight the wheel turned out to be a medium blue, and I couldn’t be happier.

That night I took out the second hand, mesh, eight inch wheel and replaced it with the brand-new, medium blue, solid surfaced Comfort wheel. Beanie came over to see, sniffed it, hopped in and began running. She seemed very pleased with the upgrade, and I’m glad I got over myself and got a twelve inch; I believe the two inches make a big difference.

Fixing Clattery Wheels

Getting a cheaper wheel was a risk I was willing to take, noise wise. I’d read several reviews on the wheel, and it was known to be a bit loud. I’d have lost many nights of sleep if someone hadn’t commented on it and suggested tying yarn or fabric around where the wheel and the stand meet; it fills the extra space and then the wheel doesn’t have anything to clatter against.

It worked like a charm. Of course, it still makes noise, but I was used to some noise since Beanie’s old wheel was even worse quality. I’ve used a few things to make it quieter, and all have worked quite well.

For the first eight or ten months I’ve used the wheel I’ve used strips of fabric tied around the empty space, but I’ve recently started using some thick yarn, which has been easier and made it quieter. Just be careful that your hamster isn’t getting a hold of the yarn; the fibres and strands can be lethal if consumed.

And that’s all my experience with hamster wheels! I know I don’t have a whole lot of experience with different wheels, but either way I hope this was helpful for those who are looking at wheels for a future or present hamster, or already own a wheel that is unbearably loud.

If you’re interested in more hamster-related content be sure to like this post and follow the blog, and I’ll be back on Tuesday with more small pet care, DIYs, recipes, cage setups, stories and more, have a ham-tastic day!

Summary

  • Get a large, solid wheel from the start so you don’t have to spend more on an upgrade.
  • Some smaller, younger hamsters cannot push a large wheel, so in those circumstances it is okay to get a smaller starter wheel.
  • If you have a clattery wheel tie some fabric strips or thick yarn around where the wheel meets the stand on the back, just don’t do it too tight or it’ll be too hard for your hamster to push.

Triangular Hide’n’Climb Toy

As you can see, Beanie has enjoyed destroying her toy through chewing. This is why I prefer my DIY cardboard toys over store bought plastic toys. Since these toys are DIYs, if Beanie really likes a toy I do, however, need to remake it opposed to buying a new one. Today I’m going to show you how to make this toy from scratch.

For this DIY you’ll need:

  • A hot gluegun
  • A ruler
  • Three skewers, or six popsicle sticks.
  • A box/craft knife (Scissors are very difficult to work with!)
  • A writing utensil, the darker the better.
  • A drawing compass or template.

A pair of scissors can be useful for cutting the skewers, opposed to a knife.

  • First cut two cardboard squares measuring 6×6 inches.
  • Now cut two triangles measuring 6×6 inches.
  • Using your drawing compass/template and pen mark out a circular doorway in the middle of each triangle.
  • Cut out the circles.
  • If you’re using skewers, which I find are grippier, cut up the skewers with your knife or scissors into six pieces. I made mine 5 inches long.
  • If you’re using popsicle sticks you’ll just need six, and don’t do anything to them.

  • Using your glue gun, glue the six skewers/popsicle sticks horizontally onto the two cardboard squares.
  • Now glue the two squares onto the triangles creating a pyramid.
  • Don’t glue the squares on so the sticks are vertical like I did, if you do you’ll have to rip the square from the triangle and re-glue it on 😂🙄

And hopefully from my images you get the idea of how to properly glue everything together.

And you’re done! This has got to be one of my favorite DIYs. It’s moderately simple to make, it’s lightweight, and it can serve so many purposes such as:

  • Climbing toy
  • Hidey house
  • Nest
  • Travel toy

The sizes I listed were for Hamsters, Gerbils and Mice, but by improvising this toy can be for so many more pets like:

  • Cats
  • Rabbits
  • Chinchillas
  • Degus
  • Small dogs
  • Sugar Gliders
  • Guinea Pigs

And probably more!

‘MOUSE MEETS MOUSE’

I’m adding a snapshot of Beanie at the end of this post, let me know in the comments section below if you’d like me to add a snapshot in a random post each week.

If you’re interested in more hamster-related content be sure to like this post and follow the blog, and I’ll be back on Tuesday with more small pet care, DIYs, recipes, cage setups, stories and more, have a ham-tastic day!

Design a site like this with WordPress.com
Get started