Updates

If you read my last post, then you are aware that Beanie recently passed away from old age. Beanie was the inspiration for this blog. I wanted to share all the cool things I was creating for her with everyone.

I realized I love sharing hamster-related information, my DIYs, and experiences with you, and I want to continue spreading correct hamster information to people all over the internet through my blog posts. So yes, I am going to continue posting weekly, and I hope you’ll stick around!

And yes, I am planning to adopt another hamster in the future! Just bear with me, because my life right now is really hectic, and I can’t get a hamster for a few months. There are also things I want to do differently the next time, but that’s a topic for another day. A few topics, actually 😉

I do plan to keep our title as ‘Beanie the Hamster,’ in honor of Beanie. After all, we wouldn’t be here without her, would we?

I’ll keep y’all posted, and per usual if you’re interested in hamster-related content be sure to like this post and follow the blog, and I’ll be back on Tuesday with more small pet care, DIYs, recipes, cage setups, stories and more, have a ham-tastic day!

Beanie’s Passing

Beanie passed away on Friday, November 27th, 2020. She was estimated to be 23 months old, and had an eventful, long life for a Syrian hamster.

On Monday, November 23rd, Beanie was quite wobbly, and I moved her to her 10 gallon tank to monitor her. I kept a heater by one side of the cage so she would be cozy, and made her as comfortable as possible.

She was struggling to groom herself, so I cleaned her carefully with a damp tissue and a toothbrush, and dropper-fed her some water.

A few days later she passed peacefully. Despite how sad I am, and how much I miss little Beanie, I’m just happy to have had the opportunity to give her the best life I could.

Next week’s post will be some updates, and if you have questions you can comment down below and I’ll get back to you in that post. Have a ham-tastic day 🙂

For Those Considering Getting A Hamster

Hamsters make awesome pets for most people, and there are plenty of reasons to get one as a companion. However, not all people are going to make good hamster owners. In this post, we’re going to talk about if you would be a good hamster owner, or if you should consider a different pet.

I’m going to ask some very important questions, which I will talk in depth about, and you’ll need to seriously consider before you bring a hamster into your home.

You should not get a hamster for someone without their knowledge. Pets are not presents. If you don’t have the knowledge, funds, time, ability, lifestyle, and interest to care for a hamster for its entire life, it’s not the pet for you. Age does not really matter; it’s maturity and ability primarily.

I do have blog posts on most if not all the topics we’ll be discussing, and those are linked at the end of the post for your reading and learning pleasure 🙂

Do I Have the Knowledge?

Hamsters require more than they seem, and if you have not done any research, then a lot can go wrong.

This is the easiest problem to solve. You do need to invest a few hours into your research, but once you have you’ll feel prepared, and caring for your new pet will be a lot more fun for you.

Literally copy and paste each of the following items into Google and read/watch from a few different sources. These are all the basic things you’ll need to know:

  • Proper hamster caging 450+ square inches
  • Safe hamster substrates
  • Hamster dietary needs
  • Watering your hamster
  • Hamster chewing toy information
  • Enriching a hamster
  • Hamster taming
  • Where to get a hamster?
  • Safe hamster nesting material
  • Basic hamster illnesses/symptoms
  • Which hamster species to get
  • Hamster wheel information
  • Hamster emergency funds

And there are SO many ways to gain hamster knowledge! There are blogs, YouTube channels, forums, and books. However you want to learn, there’s a way!

Some great places/people to learn from:

Youtube:

Blog:

Forums:

Do I Have the Funds?

When you get a hamster you have to be totally responsible for all their needs, and otherwise it’s not your hamster. A fact of life is that things cost money, hamster supplies/care included.

If someone else is paying for your hamster’s supplies it is not your hamster. You are taking care of their hamster for free.

A hamster’s needs can be expensive, especially if you need to make an emergency vet visit. The first month is the most expensive, since you need to buy a good, large cage, water bottle or bowl, toys, chew toys, substrate, and food.

After the first month you’re only buying food, substrate, new chews, buying/making new toys, and possibly buying the odd pack of treats.

The cost of a hamster depends on what you buy for them. The original reason I started this blog was to show you all how to make budget-friendly hamster toys, and that you don’t need tons of cash to own a hamster, but they do cost money to own. If you cannot afford to buy what a hamster needs then it’s not the pet for you.

Do I Have the Time?

Hamsters are cage-pets, meaning they live in a cage and need to be taken out daily to run around and explore. Since they are domestic animals they also need to be fed, watered, and cleaned up after. You should be checking on your hamster daily, and taking them out at least every other day for a minimum of 30 minutes. They need to be spot cleaned (clean out the bathroom corner) weekly, deep cleaned (wash cage and add new substrate) monthly, fed daily or bi-daily, and watered daily to weekly depending on whether you’re using a bottle or bowl.

You want to plan on spending 45 minutes or more caring for and playing with your hamster daily, for their 1-4 year lifespan. Hamsters are also nocturnal, so this time spent with your hamster might be very late at night, or super early in the morning. Waking your hamster in the daytime to play is not humane.

Do I Have the Ability?

Hamsters are small, messy, quick, delicate animals. Most kids and some adults cannot properly care for a hamster in the interaction department. Holding them carefully and cleaning the cage may be things some people are not capable of doing safely.

You should not need supervision to own a hamster. In the cases where people (usually kids) need supervision the hamster doesn’t get cared for enough.

You need to be physically able to spot clean (clean out urine and feces), deep clean (wash cage), feed, water, and play with a hamster before you get one.

If you aren’t capable of being the sole caretaker of a hamster, you should talk to your family about getting a family hamster, where everyone helps take care of it! There’s no reason a whole family can’t provide what a hamster needs.

Will a Hamster Fit Into My Lifestyle?

Everyone’s life is different, and sometimes a hamster just isn’t the pet for you. Maybe you travel a lot, or just really can’t stay up late to play with a hamster. Whatever the case, you have to consider if your life really has room in it for a hamster.

Am I Interested In Hamsters?

This is probably the most important question of them all: am I interested enough in hamsters not to become bored of owning one? When you bring a pet into your home they are your responsibility, and if you are not interested in them they will get neglected.

When you have an interest in something you diligently do your best to get it right; when you lose interest you forget or find excuses not to do it. When you lose interest in living, breathing animals it is much different than no longer wanting to do your homework.

This is why I recommend waiting a month after you think, ‘I want a hamster,’ before actually getting one. A month later you will know whether or not you are as passionate about getting a hamster as you thought, and you’d have had time to research their care so you know how to properly care for a hamster.

Conclusion

Go ahead, ask yourself:

  • Do I have the knowledge to properly care for a hamster?
  • Do I have the funds to provide proper care and and
  • enrichment for a hamster for their lifetime?
  • Do I have the time for daily care and playtime?
  • Do I have the ability to provide the required care?
  • Will a hamster fit into my lifestyle, or should I consider another pet?
  • Am I interested enough in hamsters not to become bored of owning one?

When you are considering getting any pet, you need to ask yourself these questions.

If a hamster isn’t for you right now, it is just best to wait. You won’t regret waiting, or never getting a hamster after all if it doesn’t work out for you. If you decide you don’t really want one after all, that’s totally fine. If you told people you wanted a hamster and decide you really don’t want one after all, you can say no.

If you agree with my points and you’re interested in more hamster-related content be sure to like this post and follow the blog, and I’ll be back on Tuesday with more small pet care, DIYs, recipes, cage setups, stories and more, have a ham-tastic day!

Related/Educational Posts:

Sources:

Hamster Hideout Forum

Corner House DIY Tutorial

Welcome to the Corner House DIY Tutorial! You may have seen me use this house in a few Monthly Cage Makeovers, and now I’m going to be showing you step by step how to create it for your own small pets!

To create this house you’ll need:

  • Thin cardboard
  • A hot glue gun
  • Ruler
  • Dark marker
  • Crafting knife
  • Drawing compass or circular template
  • First cut a rectangle of cardboard measuring 12 inches by 4 inches. Draw a circle for a doorway a suitable size for your pet (2-3 inches in diameter).
  • Cut out two more rectangles measuring 9 inches by 4 inches.
  • Now hot glue the 3 pieces into a triangle as shown above.
  • Put the glued triangle over a piece of cardboard and trace the exterior of the walls.
  • Cut out the traced triangle. This is the roof.
  • Glue the roof onto the house, and this DIY is complete!

If you’re interested in more hamster-related content be sure to like this post and follow the blog, and I’ll be back on Tuesday with more small pet care, DIYs, recipes, cage setups, stories and more, have a ham-tastic day!

Hamster Nesting Materials

In order to stay snug and comfy while they sleep hamsters like to stuff their beds with all sorts of things. Today we’re going to be chatting about some things you can offer for your hamster’s bed.

Nesting material should be:

  • Cozy
  • Pet-safe
  • Absorbent

Cozy so they’re comfortable, safe for their well-being, and absorbent since many hamsters urinate in their nests. We’re going to be going through these criteria and the pros and cons of the most popular nesting materials for hamsters. Keep in mind nesting material and substrate are two very different things, and the following items are not suitable as substrates.

Shredded Tissue

Shredded tissue or toilet paper is a common nesting material, and a very good one in all areas. It is very warm and cozy, making it perfect for colder climates or seasons. Tissue is perfectly pet-safe, and if your hamster consumes it you don’t have to worry about them getting plugged up, since it pretty much dissolves in the stomach and digests without issues. Tissue is made to absorb, and works wonders in the absorbing department. It has the added bonus of being rather cheap. Overall an exceptional nesting material.

Cotton

Pet stores sell cotton or cottony-like materials for small pets, but that doesn’t mean it’s good for your pets. It may be warm, but it causes more harm than good. Often hamster’s limbs or teeth get tangled in the fine fibers, resulting in necessary amputation surgery or death. Cotton isn’t absorbent, either. Primarily for safety reasons I do not recommend it for any pet.

Hay

Hay is quite beneficial, as it provides extra fiber which is great for digestion, should your hamster choose to nibble on it (most hamsters don’t love eating hay). It’s a great choice for your hamster. Timothy hay and orchard grass are the best options, and can be found in most pet stores or online. When selecting hay, make sure the hay is soft and green, and that there isn’t a huge mess of crumbled bits and dust in the bottom of the bag.

Hay isn’t the most absorbent, but so long as your substrate is, it isn’t a huge problem. It’s also not as warm as shredded tissue, but it can help keep your hamster cool in the summer. I definitely want to try hay with Beanie next spring/summer, it sounds like a great nesting material to use. If any of you use it please comment down below and tell me about it!

Conclusion

Nesting materials don’t have to be super fancy, and so long as it’s cozy, safe, and absorbent you should be good. I would recommend researching a new material before giving it to your hamster. If you have tried any other nesting materials please comment and share your ideas and experience!

If you’re interested in more hamster-related content be sure to like this post and follow the blog, and I’ll be back on Tuesday with more small pet care, DIYs, recipes, cage setups, stories and more, have a ham-tastic day!

The November Cage Makeover (2020)

Hello and welcome to this month’s cage makeover! I post a cage deep clean and makeover post the first week of each month. That way I can share my setup ideas with you, and freshen Beanie’s cage with a new and enriching DIY based setup for her!

Any bold items have tutorials or posts about them, which are linked at the very end.

Above I have the ‘before’ picture, which is the October Makeover dwindling from its glory. In it we have a barred foraging toy, water bowl, 12 inch Comfort Wheel, Pringles can tube, bendy bridge, paper towel tube swirl, ladder-like piece of wood, corrugated foraging cardboard, Bran-Bowl, Krinkle-It foraging toy, terra cotta pot saucer, fruit carton hut, rock, and corner house.

For today’s makeover I have a whole ton of new DIYs I made recently, and have been saving for this makeover. Since they’re all new, I’m going to be reusing most of Beanie’s old substrate so her cage has a familiar scent. I will have tutorials for all of these new DIYs, and they’ll be posted throughout the next few months 😀

  • First I emptied everything from the cage, wiped it with vinegar/water, and put the substrate in. Make sure when you add substrate to have 6 inches all around for burrowing.
  • Next I added in my Staircase Hidey House and Semicircular Hut, submerging them in substrate.
  • I scooted most of the substrate to the right side of the cage so Beanie’s wheel would fit.
  • I submerged a tube as a burrow starter, put my circle house in the top corner, and added in a bowl, ladder-y thing, and Beanie’s rock.
  • Next I bent Beanie’s bendy bridge over the entrance of the submerged tube to create a secret doorway.
  • I put a piece of wood on the scenic mountain of substrate.
  • Then I added a bunch of boredom breakers and chew toys (The Cliche Boredom Breaker Collection), along with a piece of corrugated foraging cardboard.
  • And last but not least, I sprinkled food and shredded tissue around for Beanie.

Thank you so much for reading this post! I hope you enjoyed it, and that it’ll provide inspiration for your hamster’s cage setup, and that you found it entertaining.

A little update: Beanie is now 23 months old, and has been showing some signs of aging. She sleeps in later, and despite the fact she is very active and energetic when I bring her out to free roam, she doesn’t have extra energy to use her wheel (I still think having it in her cage is good). She has lost some weight, and her fur has thinned a bit (both very normal signs of aging). Overall, Beanie is doing pretty good for her age.

Beanie’s going to be 2 on December 15th!! I’m making a birthday party post with a few recent little stories and other updates compiled into it for you, so we can all celebrate little Beanie together 😉

If you’re interested in more hamster-related content be sure to like this post and follow the blog, and I’ll be back on Tuesday with more small pet care, DIYs, recipes, cage setups, stories and more, have a ham-tastic day!

Related Posts and DIY Tutorials:

My Hamster Care Schedule

When you get any pet you create your own routine and care schedule. It may not be written out, but it exists nonetheless. Scheduling is a part of pet owning I personally really enjoy, and some people just do things as needed, which is totally fine. You want to have a routine that works for you. Today I’m going to be sharing Beanie’s schedule, which you can draw inspiration from.

As I stack up the routines, keep in mind each separate thing is in addition to the previous ones. In addition to my daily routine I do the bi-daily, and so on.

I’m going to tell you about Beanie’s care/cleaning schedule as well as her purchasing schedule (when I buy food, substrate, chews etc…).

As usual I will have any related posts linked at the end of this post!

Daily

Every morning after my breakfast I go to attend to Beanie. First I straighten any tipped or moved toys and sweep off things and clean out her wheel. Next I spin her wheel to ensure it’s working, and check her water. If it has substrate in it or is not quite full I rinse out the bowl and refill it.

  • Tidy
  • Check wheel
  • Clean water if needed

Bi-Daily

Every other day I do my morning Beanie-chores as usual, and I also feed her. Since I scatter feed Beanie I prefer to give her twice as much every other day, so I know she has time to collect everything. If I didn’t feed her yesterday, I feed 4 teaspoons of seed mix today.

  • Feed 4 tsp

Weekly

On the weekend I spot clean. Hamsters like to keep their environment as clean as possible, so they usually only do their business in one or two places. Beanie pees in her nest, and to prevent mold or foul odor I clean it out weekly.

I wait until Beanie’s awake at night, then dig up her nest and throw out all the shredded tissue, old food, and soiled substrate. I add fresh shredded tissue and replace the hut. I then feed her, since her stash is in her nest and should be replaced for her peace of mind.

Beanie usually has a chew toy in her nest as well, and I determine whether or not it needs replacing.

I usually do this on Saturday night, but will do it on Friday or Sunday if I’m not home. Sometimes her feeding day is spot cleaning day; in those instances I feed her only a teaspoon in the morning so she’s not hungry till I feed her at night after the cleaning, and then I don’t waste as much food.

  • Removed soiled substrate and bedding from nest
  • Feed 4 tsp after spot cleaning
  • Make sure chew toys are still good

Monthly

If you’ve followed me for a while you know the first post of the month is a Monthly Makeover! I blog Beanie’s cage deep clean and new setup for you, so you can get inspiration for your own small pet’s cage.

In order to get that post out on time I do Beanie’s monthly deep clean the weekend before the Makeover is due (the last weekend of the month).

First I remove all the substrate, sorting the soiled stuff into the trash and the clean stuff into a new bag. I then sanitize her cage with a vinegar/water solution, dry it, and replenish the cage with the clean substrate and some new substrate.

I then do a totally new, DIY based cage setup for Beanie, and release her back into her clean cage!

I do this so Beanie’s cage can be fresh, rejuvenated, and enriching for her. I also remove substrate doing the weekly spot cleans, and need to add more so she can burrow.

  • Trash soiled substrate
  • Clean cage
  • Add in clean/new substrate
  • Create epic new setup
  • Release Beanie into her fresh cage!

When I Give/Buy Treats

I eat a lot of fruits and vegetables, and whenever I have some that I’m eating that’s Beanie-safe I just share a bit with her. Usually 1-3 times a week.

I don’t actually buy hamster treats for Beanie, since they’re usually really unhealthy and fresh fruits and vegetables make a much better treat (especially her favorite, banana).

When I Buy Beanie’s Seed Mix

Beanie’s my only hamster, so she’s the only one eating a hamster seed mix, and a full bag lasts quite a while. Four months to be exact. Next food shopping trip will be in December, around her 2nd Birthday.

When I Buy Substrate

I purchase Beanie’s pet-safe substrate in a huge 4 cubic foot bag a few times a year. When I get it depends on how much I need for the next deep clean.

When I Buy Chew Toys

When I buy chew toys totally depends on Beanie. Sometimes she doesn’t really chew anything for a week or two, and sometimes she’s chewing through a chew a week. Usually I just buy nice chews I find that are safe and interesting, or make DIYs that stimulate chewing behaviors.

I finally found Whimzee Dog Chews in a bulk bin at a pet shop, and Beanie absolutely loves them! I definitely recommend them if you’re looking for chew toys. They are hamster-safe, and the alligator-shape gives hamsters lots of little knobs and things to chew off. I would, however, only recommend 1-2 a month, since it is still a treat.

I wonder how many times I said, ‘chew,’ in those two paragraphs.

Conclusion

As previously stated, this is just Beanie’s schedule. You don’t have to use this exact schedule for your hamster. Every hamster is also different, some eat more or less, so you might have to buy food more or less often. You don’t want to be cleaning your hamster’s cage excessively, because if their environment is too clean they will have a very weak immune system and are more likely to get sick, but you do need to spot clean at least once a week.

Thank you so much for reading this post! If you’re interested in more hamster-related content be sure to like this post and follow the blog, and I’ll be back on Tuesday with more small pet care, DIYs, recipes, cage setups, stories and more, have a ham-tastic day!

Links

Why Give Hamsters Naturalistic Lifestyles?

In the dead of night a wild hamster scours his 10-square-mile-territory, collecting little scraps of almost anything, usually food or bed related things such as feathers, soft grasses, seeds, and insects. After filling his cheek pouches, the little hamster makes his way back to his burrow. Occasionally he encounters a fox snooping around. Unfortunately, he must silently remove his finds from his pouches in order to make a stealthy getaway. The hamster memorizes the spot, hoping the loot is still there when he returns a few nights later. The average hamster makes several trips like this during one night, finding food, water, and bedding.

In the depths of the earth he’s created intricate tunnels and rooms, up to 10 feet deep. Hamsters are very organized creatures, sorting their things into separate ‘rooms.’ Bathroom, bedroom, food storage room.

In captivity hamsters are provided with everything they need by their owners. A territory, food, water, substrate, and nesting material are things they no longer have to search for, which is why so many domesticated hamsters live in boredom.

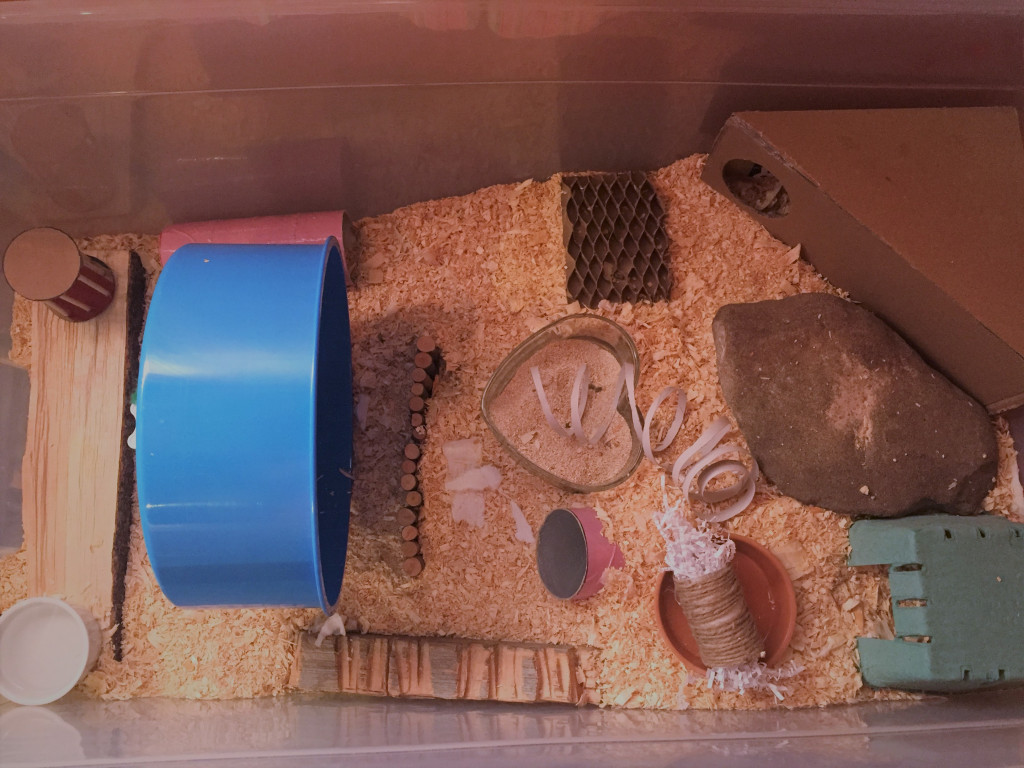
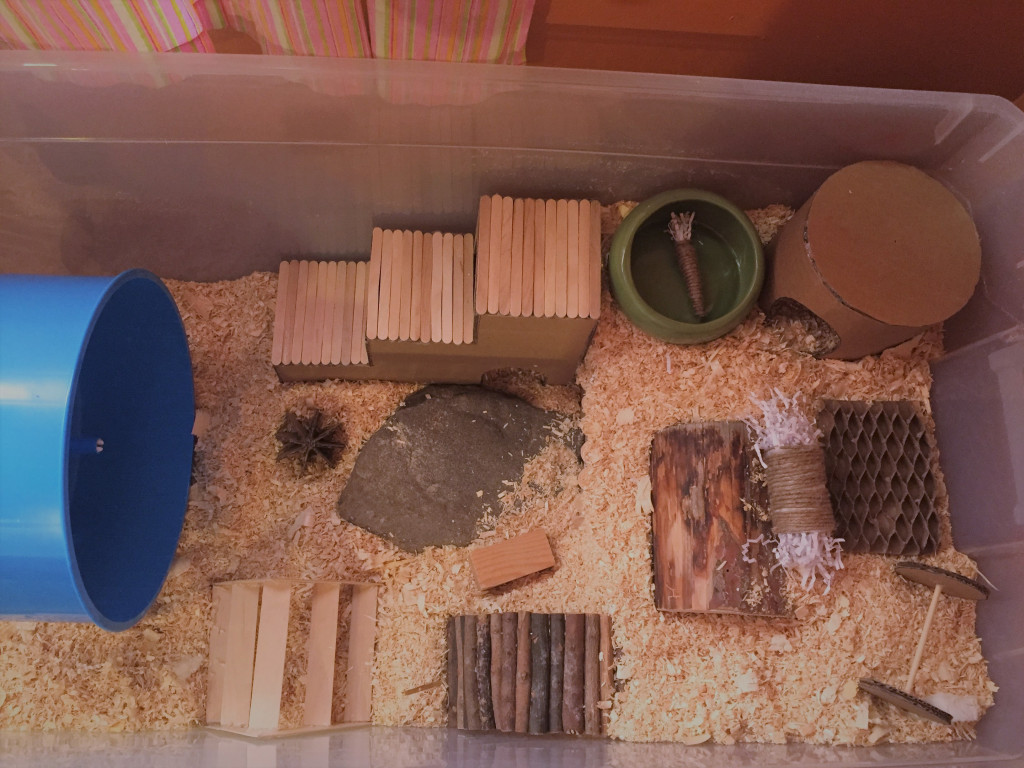
By providing a more naturalistic setup and lifestyle hamsters tend to be less bored and have a happier life. Let’s talk about a few ways to provide a more naturalistic lifestyle for your hamster!

Today we’ll be covering:

  • Scatter Feeding
  • Natural Toys
  • Deep Substrate
  • A Large Cage
  • Wheel
  • Water Bowl

Scatter Feeding

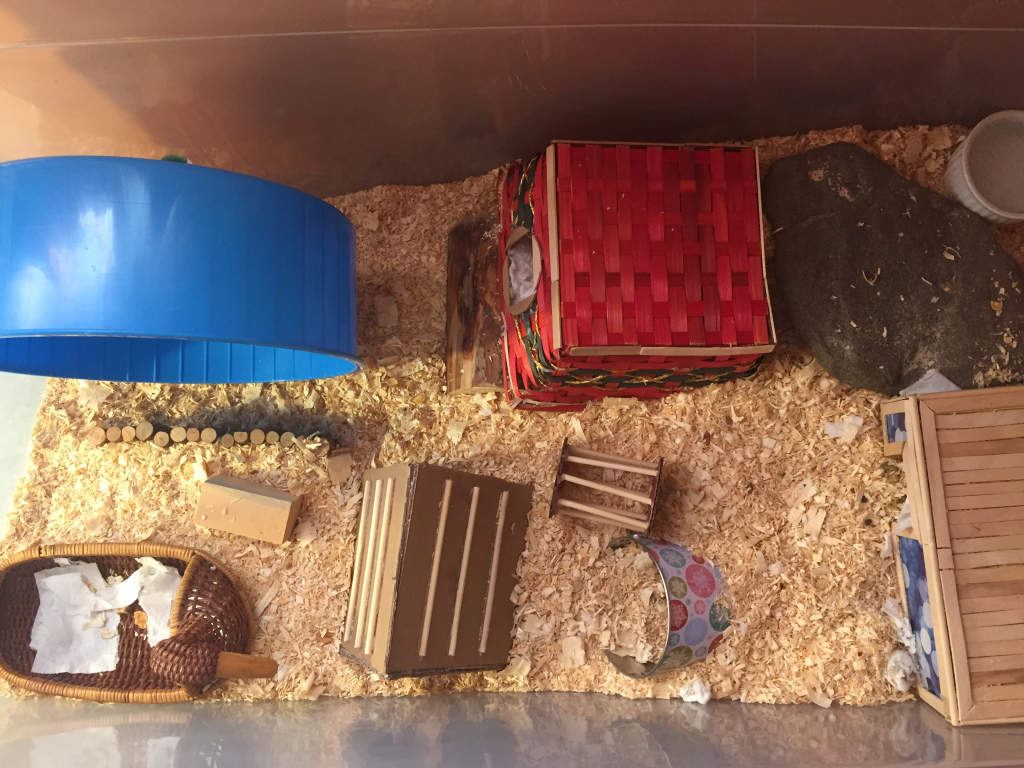
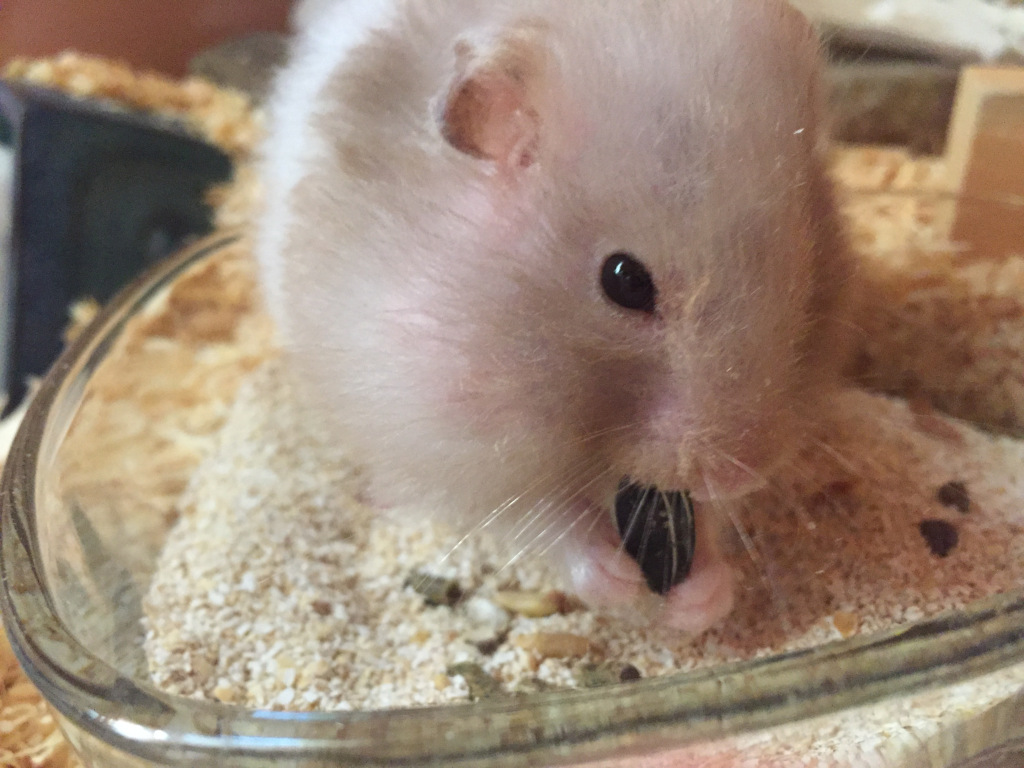
Scatter feeding is by far the most enriching and natural feeding method. There are two main ways to scatter feed: pouring little piles of food around the cage and full on sprinkling it everywhere. Your hamster gets to scavenge for their food as they would in the wild, and it’s an amazing way to keep them busy! I have used both methods and they both work very well, however I do recommend feeding them every other day, and twice as much so your hamster has time to find all the food.
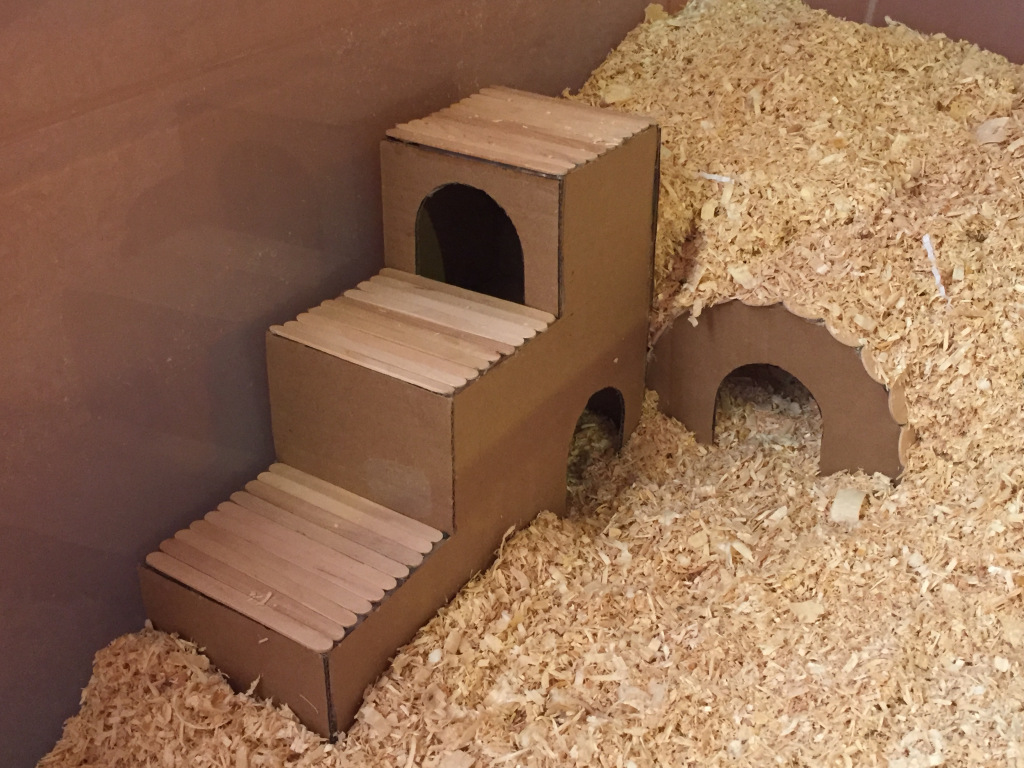
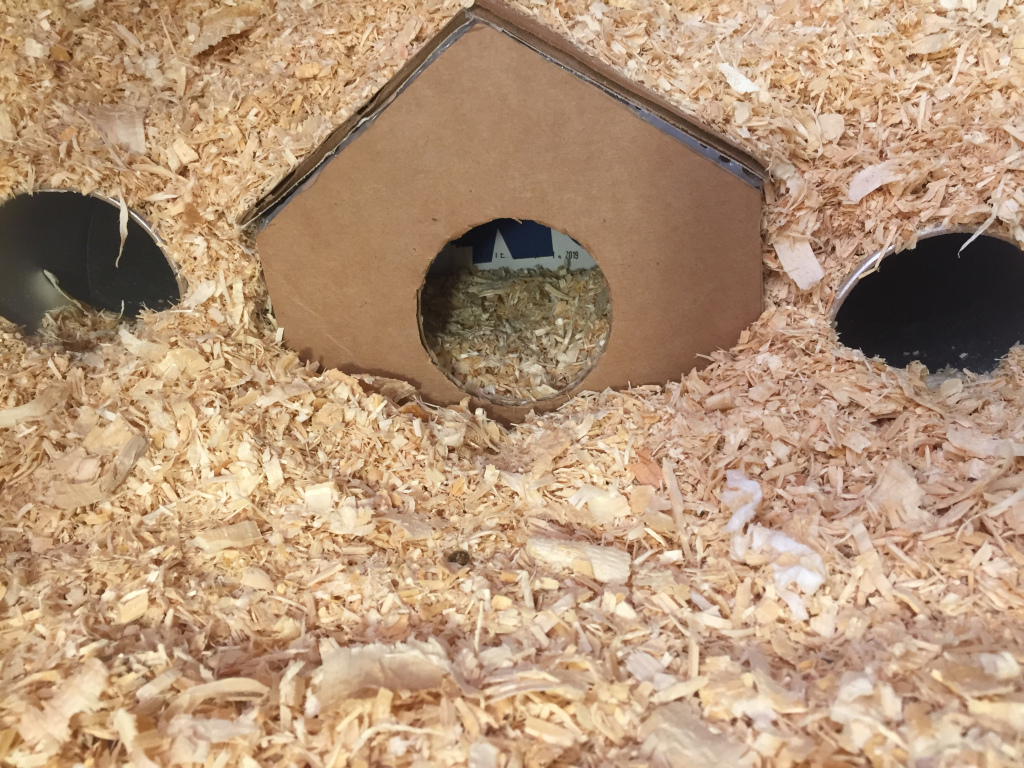
Natural Toys

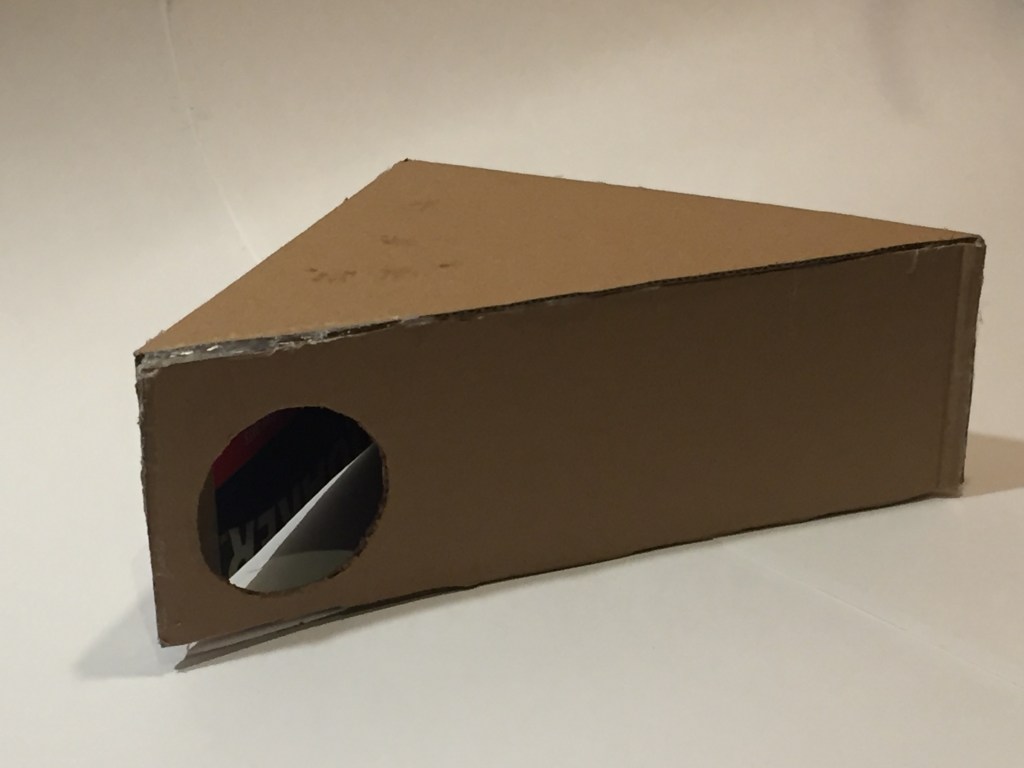
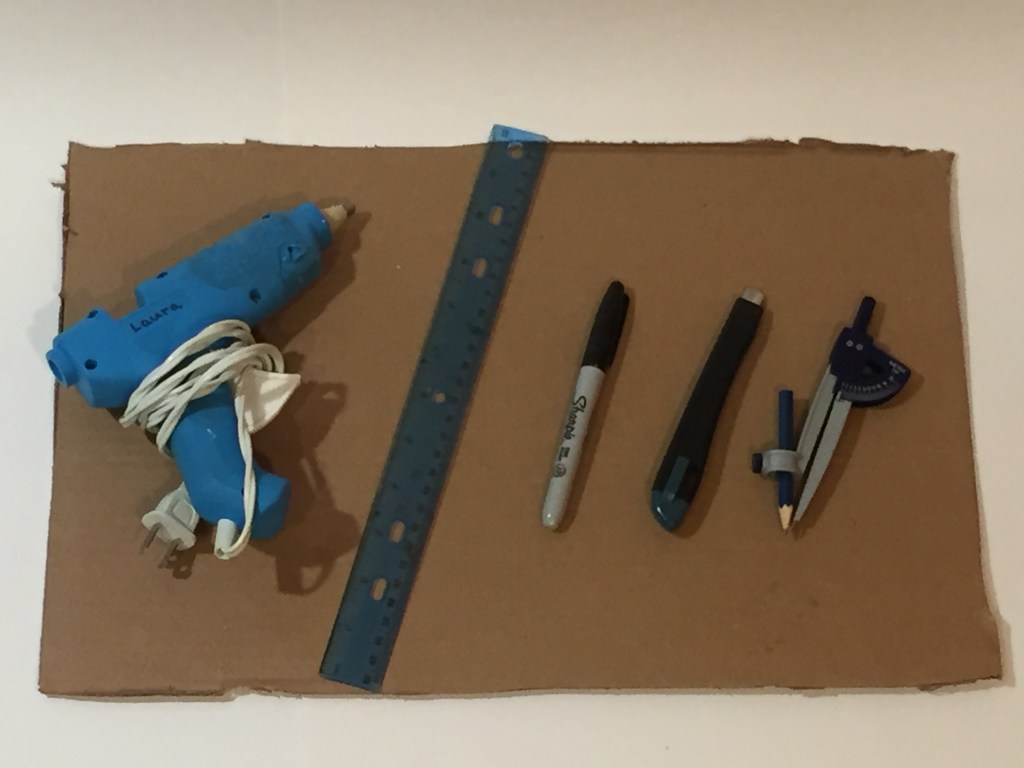
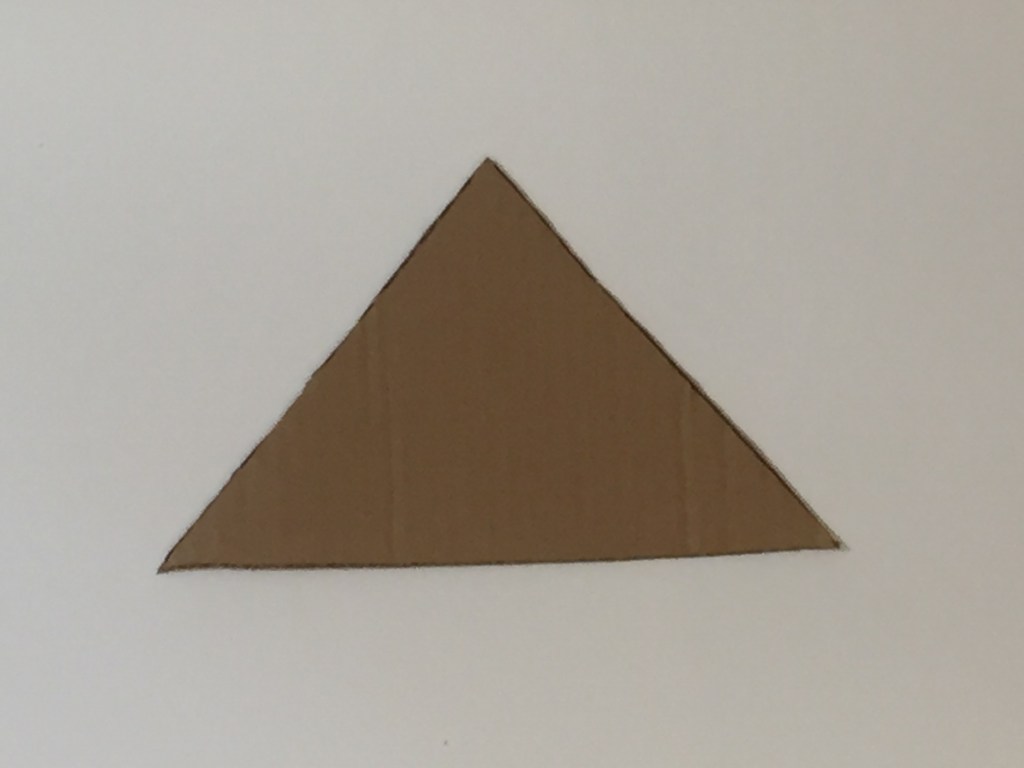
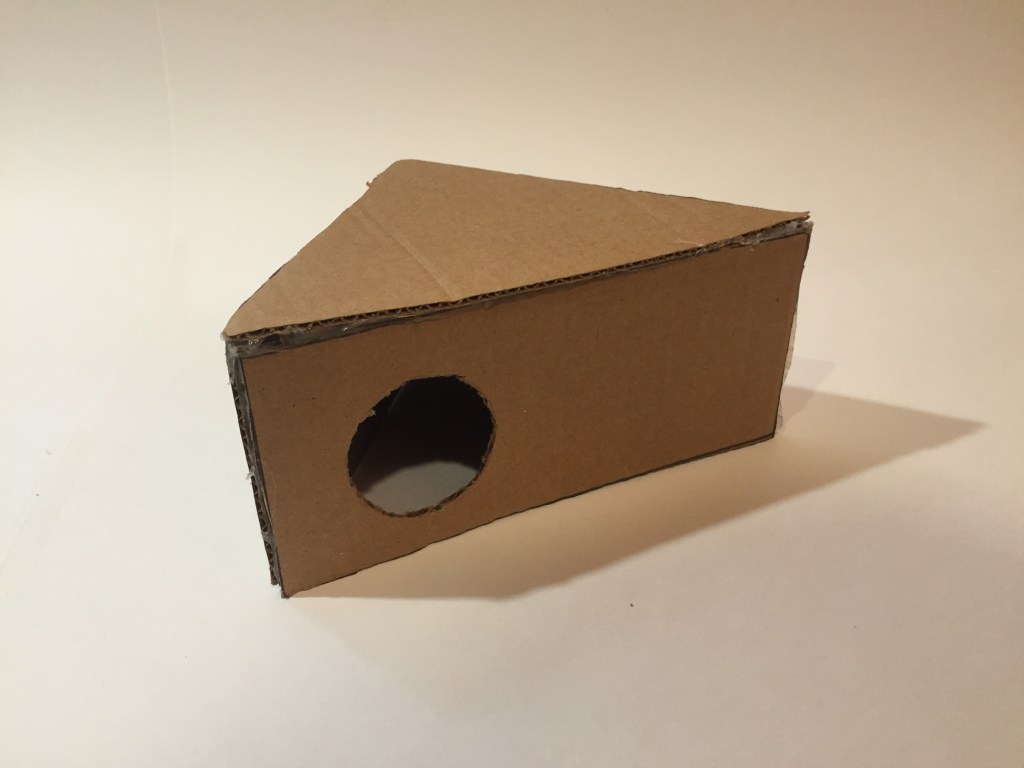
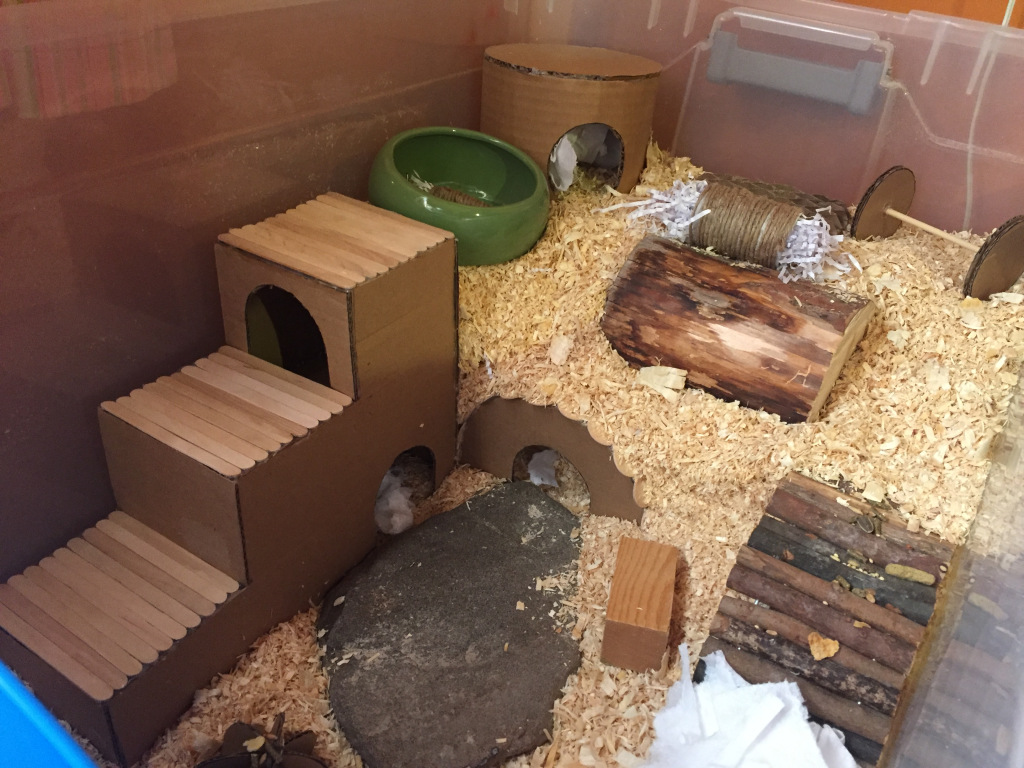
Natural toys are very beneficial since, unlike with plastic toys, your hamster can chew them without the risk of getting plugged up if they eat it. They are usually made of wood and/or cardboard. Remember, you want to be encouraging your hamster to chew hard objects (just not cage bars!) because their teeth are always growing and need to be ground down with chewing.

I have quite a few tutorials for natural DIY hamster toys and huts, which are linked at the end of this post 🙂
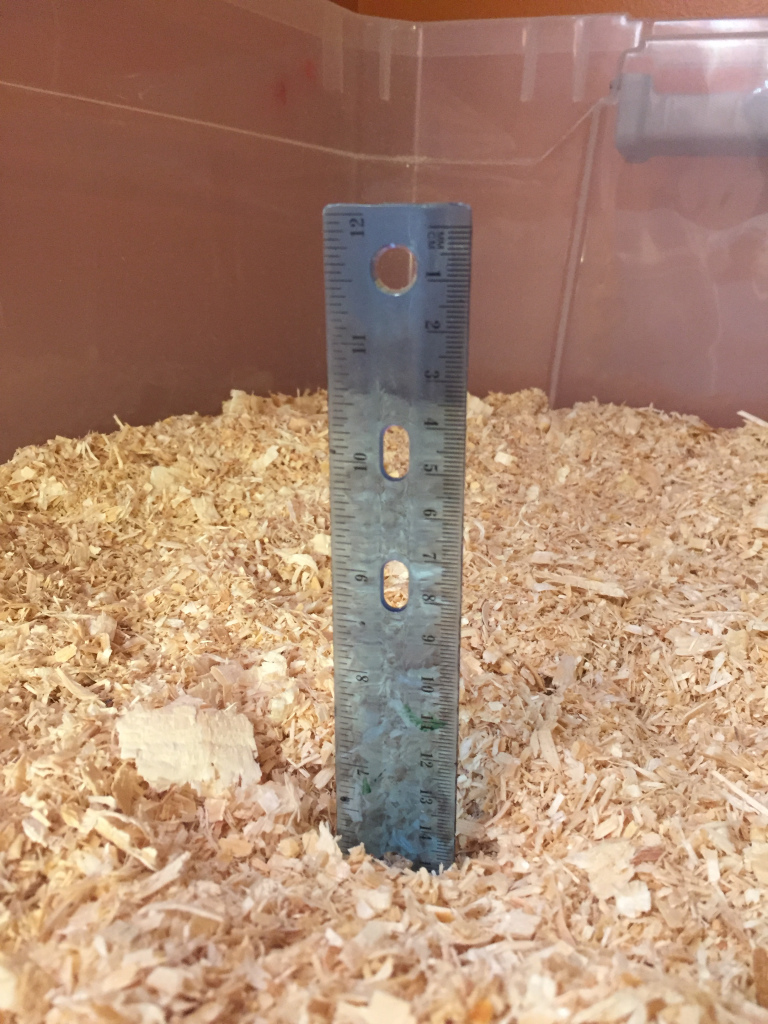
Deep Substrate

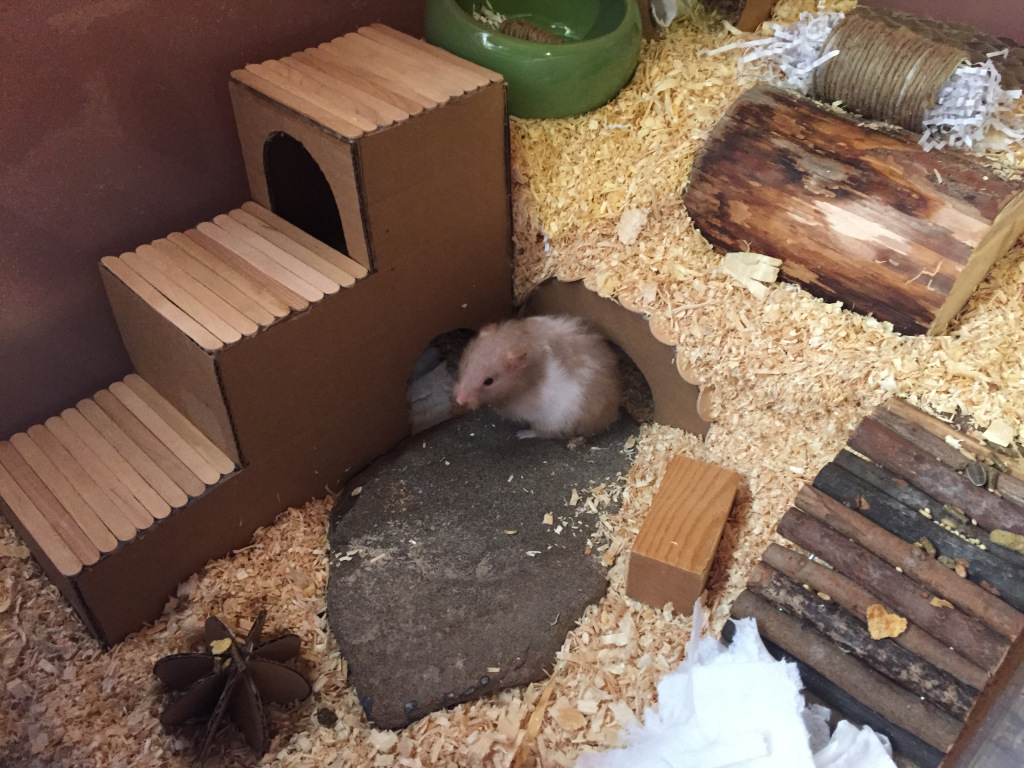
Substrate is a requirement for hamsters. They need at least six inches of substrate for burrowing, but by adding more depth your hamster can create better, deeper burrows like they would in the wild. Rule of Thumb: substrate can never be too deep. Personally, I like Beanie to have at least eight inches of depth in her substrate. Some hamsters may need encouragement to burrow, and by partially burying some tubes or huts they will usually dig out of those and make tunnels of their own.
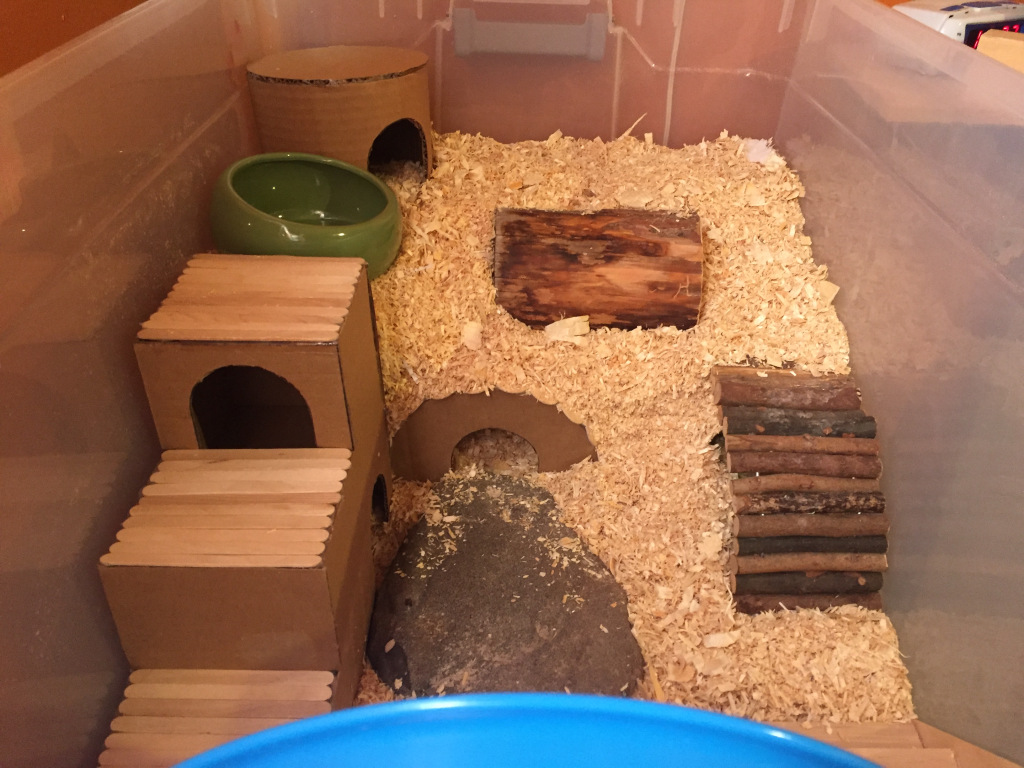
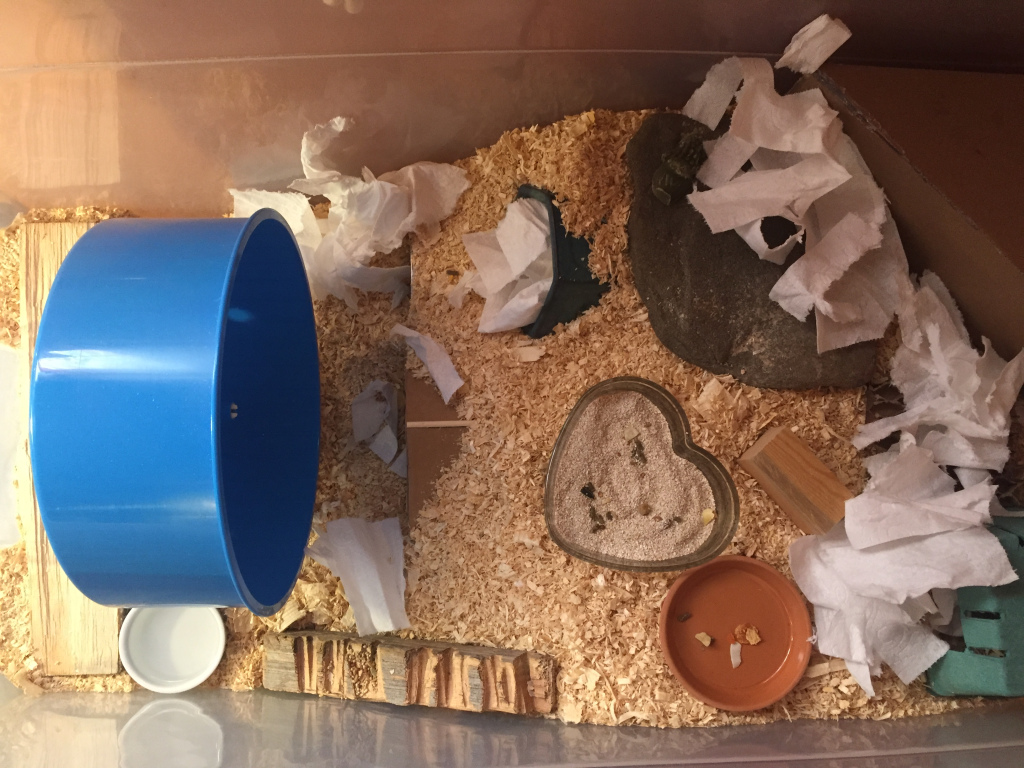
A Large Cage

Yes, hamsters can live in shoe-box-sized cages, but you could live in a closet too if someone was feeding you regularly, and you wouldn’t be happy. Hamsters aren’t happy in cages they can just fit in.

The bare minimum for a hamster cage is 450 unbroken square inches of floor space. To calculate the square inches of a cage you times the width by the length. Any additional floors or levels do not count towards the square inches (this is a mistake I’ve made).

A cage that big may sound expensive, but surprisingly, they’re not! Most if not all appropriately sized hamster cages are the same price or cheaper than the tiny pet store cages. Some good examples are the Prevue 528, Ikea Detolf Hamster Cage DIY, the Super CritterTrail, and the Sterilite 200 Quart Bin Cage, all ranging from $20-$170 with over 500 square inches of floor space.
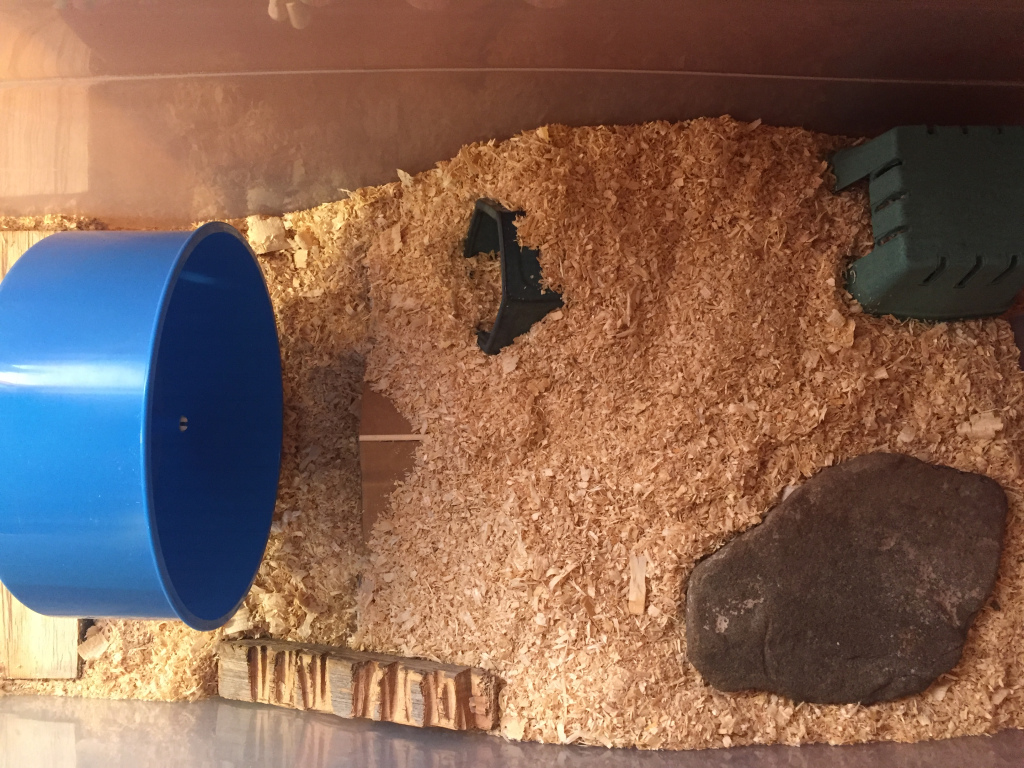
Wheels

In the wild hamsters get a lot of exercise collecting their food, but in captivity, even if you scatter feed, they don’t get nearly as much exercise as they would in the wild. Your hamster has the same amount of energy as a wild hamster, since all domestic hamsters are just descendants of wild hamsters.

Since domestic hamsters don’t have the huge amount of territory wild hamsters do they don’t get as much exercise guarding their space as a wild hamster. They need a way to burn off all that natural energy, and the best answer is the hamster wheel.

Having a wheel is very important for hamsters. What’s even more important is having an appropriate wheel. Wheels go by two things: size and style. The wheel needs to be big enough in diameter that your hamster’s back is not curved. Beanie is about five inches long, and ridiculously, her wheel is 12″ in diameter. As crazy as it may seem, her wheel is the perfect size for her; when she runs in it her back is straight, and that’s what matters.

The second criteria: style. The three main styles of wheel are flying saucers, wire wheels, and solid surfaced wheels. Flying saucers are usually not preferred because they take up so much floor space. Wire wheels should not be used. They are rarely well made, cause many injuries, and result in bumblefoot.

Solid surfaced wheels provide the safest exercising experience. Although they are usually more expensive, they prevent common injuries that occur when hamsters use other wheels (caught limbs, broken limbs/toes etc…). Some great wheels I would recommend are the Comfort Wheel, Wodent Wheel, and the Carolina Storm Wheel.
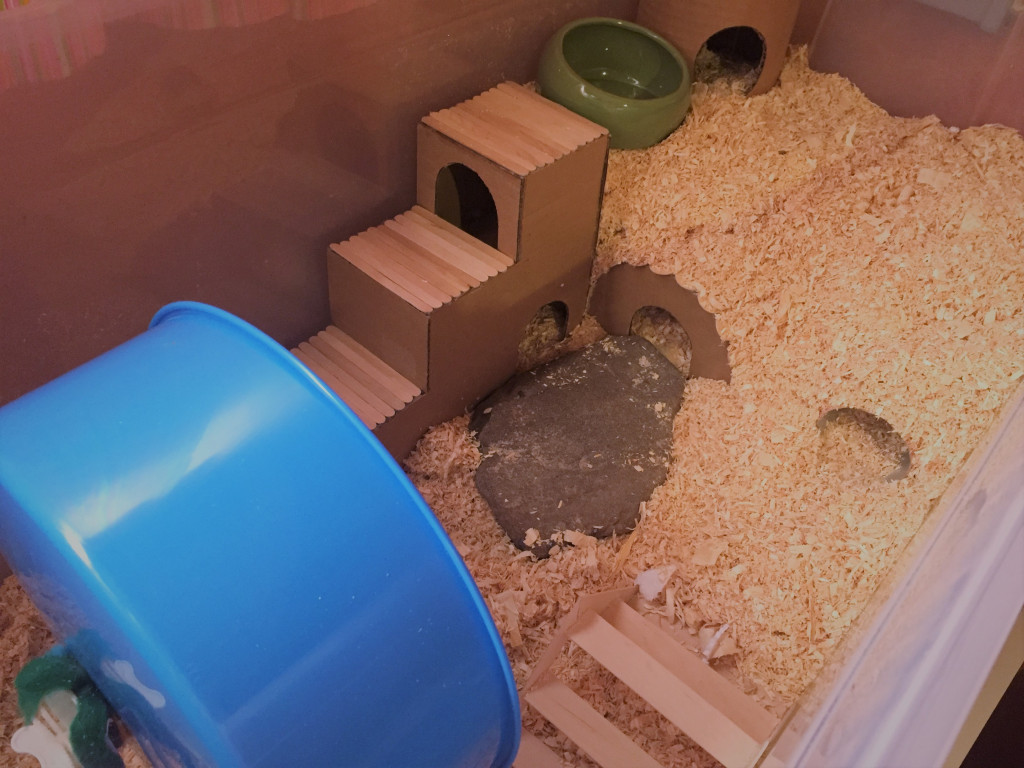
Water Bowl

Beanie’s eight ounce bottle was really easy and simple to use. I would just check it daily and refill it every Saturday. However, sometimes it would clog for no apparent reason, leaving Beanie with no water source. This worried me, and so I switched her to a water bowl.

I love using a water bowl for Beanie. Sometimes it can be a pain, but overall it’s totally worth it.

Water bowls usually need to be cleaned every other day due to substrate getting in it and it running low. With all the refilling, the water in the bowl is fresher, which is just pleasant for the hamster 🙂

Water bowls also simulate a more natural drinking posture. Your hamster is no longer craning their neck to drink. Instead, they’re lapping it up like a wild hamster would drink from a puddle.

Overall, I think bowls are a more natural way for hamsters to drink, and totally recommend them to those who are going for a more naturalistic lifestyle for their hamster.

Final Thoughts

It always amazes me how easy it is to improve your hamster’s life just by providing more natural surroundings and care. All it takes is a little willpower, money, and research.

Something I always find sad is that people believe they can’t change, and that they can’t give their hamster the life they deserve. They’re wrong. You can change for the better.

Nobody starts out as a great pet owner; I certainly didn’t! A good pet owner doesn’t start out good; a good pet owner acknowledges their mistakes, fixes them, learns from them, and educates other owners.

I hope this post was educational and informational. If you’re interested in more hamster-related content be sure to like this post and follow the blog, and I’ll be back on Tuesday with more small pet care, DIYs, recipes, cage setups, stories and more, have a ham-tastic day!

Related Posts:

Beanie’s Cold

September 11th, 2020, started out like any other day. I did Beanie’s morning routine as usual, and then sat at the desk in my pets’ room to sketch.

Soon Beanie emerged from her nest to gather her food, and when I heard her I went to say hello. As soon as I saw her I knew something was wrong.

Beanie appeared restless, pacing around her cage. Her nose was dripping wet, literally. She looked somewhat rabid. I took her out of her cage and put her into her paper-towel-lined carrier, and assessed her situation.

My Plan of Action

I decided it could be either the flu (Yes, hamsters do get the human flu) or a respiratory issue. I research hamster-related anything as a hobby. In my researching endeavors I’d learned a bit about such issues, so I had an idea of how to handle the situation.

First I cleaned out her 10 gallon tank (holding cell) and lined it with paper towels. I put in her plastic igloo (with shredded paper towels in it), a water bowl, and a food dish, then transferred her into it.

When I took her out of the carrier the paper towel inside was spotted with snot, and it was getting all over my hands.

By having paper towels as a lining I could easily monitor her. I could see how much she was peeing, as well as if her nose continued to drip.

I then retrieved my humidifier, eucalyptus oil, and heat dish. I set up the humidifier with the oil in it and the heat dish beside the small 10 gallon tank. Since the glass would get hot (which it did) from the heat dish, I cut a piece of cardboard and taped it on the inside of the hot glass to prevent burns. She could now move to the other half of the cage to get warmer if she needed. The humidity would assist with clearing her nose. The eucalyptus oil helps with relaxation and provides a nice smell.

Next I headed out to find organic thyme. Thyme is amazing at curing all sorts of respiratory issues or illnesses in general, and I needed to make some ‘Thyme Tea.’

When I returned with the pack of organic thyme plants I put some water on to boil while I washed the thyme. I then put a ‘piece’ of thyme in a mug and poured about 5 tablespoons of boiling water over it, then steeped it.

*10 Minutes Later*

I removed the thyme from the freshly made tea, and put it in the freezer to cool.

*5 Minutes Later*

I then put the cooled tea into a hamster bottle, replacing the water bowl with it.

Beanie’s Recovery

Now, Beanie was still in her 10 gallon tank (holding cell), and I needed to fix up her actual cage. I didn’t want to keep her in the tiny 10 gallon tank for who knows how long while she recovered.

I cleaned out her cage, lined it with paper towels, put in the tea, a few toys, huts, and scattered food inside.

I left Beanie alone to rest for the day, and just checked in every hour or two.

That night Beanie awoke and emerged from her nest in the tank. She was already looking a lot better, and her face was dry.

I moved her into her bin cage, and kept the heat dish and humidifier set up near her cage.

When she explored the Thyme Tea she seemed to really like it (to my delight!), and kept going back to drink it. The tea was her only source of hydration I offered so she would drink it, but I don’t think she minded at all 😅

I didn’t take Beanie out to free roam for three nights, so she could rest. She was drastically improving, and after five days of treatment she was completely normal. To her delight, I returned her cage to normal that night, and the first thing she did was dig in her substrate.

Final Thoughts

Since Beanie’s encounter with the flu and her recovery she has been totally normal, and is living happily and healthily. I’m very glad it wasn’t too serious, and that she made such a quick recovery, especially since she’s quite old (about 21 months at the time). I acknowledge I am not a vet; the treatment I gave Beanie was solely based on my research, and may not work for everyone.

If you’re interested in more hamster-related content be sure to like this post and follow the blog, and I’ll be back on Tuesday with more small pet care, DIYs, recipes, cage setups, stories and more, have a ham-tastic day!

Sources

The Hamster Hideout Forum

Caring Pets

The October Cage Makeover (2020)

Welcome to the October Cage Makeover of 2020! As shown above, Beanie‘s cage is dwindling from interest, and definitely needs a clean and makeover.

In her current setup she has some toys, such as her wheel, duck basket, hide’n’climbing toy, bendy bridge, chew block, a little tin bucket, basket hut, luxury house, foraging toy, rock, and water bowl.

I will have the bold items in this setup and the new setup linked at the end of this post, if you’re interested in recreating or learning about them 🙂

The first step is to remove everything from the cage, put Beanie in her holding cell, and replace any soiled substrate. I also make sure there’s 6 inches of substrate all around for burrowing.

I then piled most of the substrate up one side of the cage. Now Beanie’s 12 inch wheel can fit in her cage, and she has extra depth there for burrowing. I put a piece of wood as a platform to go behind the wheel, and inserted 2 Pringle can tubes into the substrate as burrow starters.

Next I partially submerged her adorable little house between the Pringle can tubes.

After deciding which other toys I wanted to use, I began to work out where I wanted them. This step is so fun!

I had added a little carton hut, my corner house, ladder-like piece of wood, a submerged flower pot, and some thick, corrugated foraging cardboard. But it needed a few more things, just to take up space.

After adding a bran-bowl and little terra cotta saucer food dish, I was content with Beanie’s cage setup. Now for the finishing touches!

Voila! A water bowl, some shredded tissue and scattered food later, Beanie’s cage is complete! Now time to put impatient little Beanie into the fresh cage…

Beanie seems to like the new setup, too! Oh Beanie 🥰

Thank you for reading this post! I hope you enjoyed it, and that it’ll inspire new ideas for how to set up your hamster’s cage! If you’re interested in more hamster-related content be sure to like this post and follow the blog, and I’ll be back on Tuesday with more small pet care, DIYs, recipes, cage setups, stories and more, have a ham-tastic day!

Related Posts:

Design a site like this with WordPress.com
Get started